Webhooks
If we don't have a built-in integration for the tool you want to use, webhooks let you connect almost anything. Any app that can send data to a URL can trigger a Portant workflow, including Tally, Typeform, Zapier, and custom code.
This page covers the full setup: picking webhooks as the source, generating a webhook address, sending a test payload, and finishing the workflow.
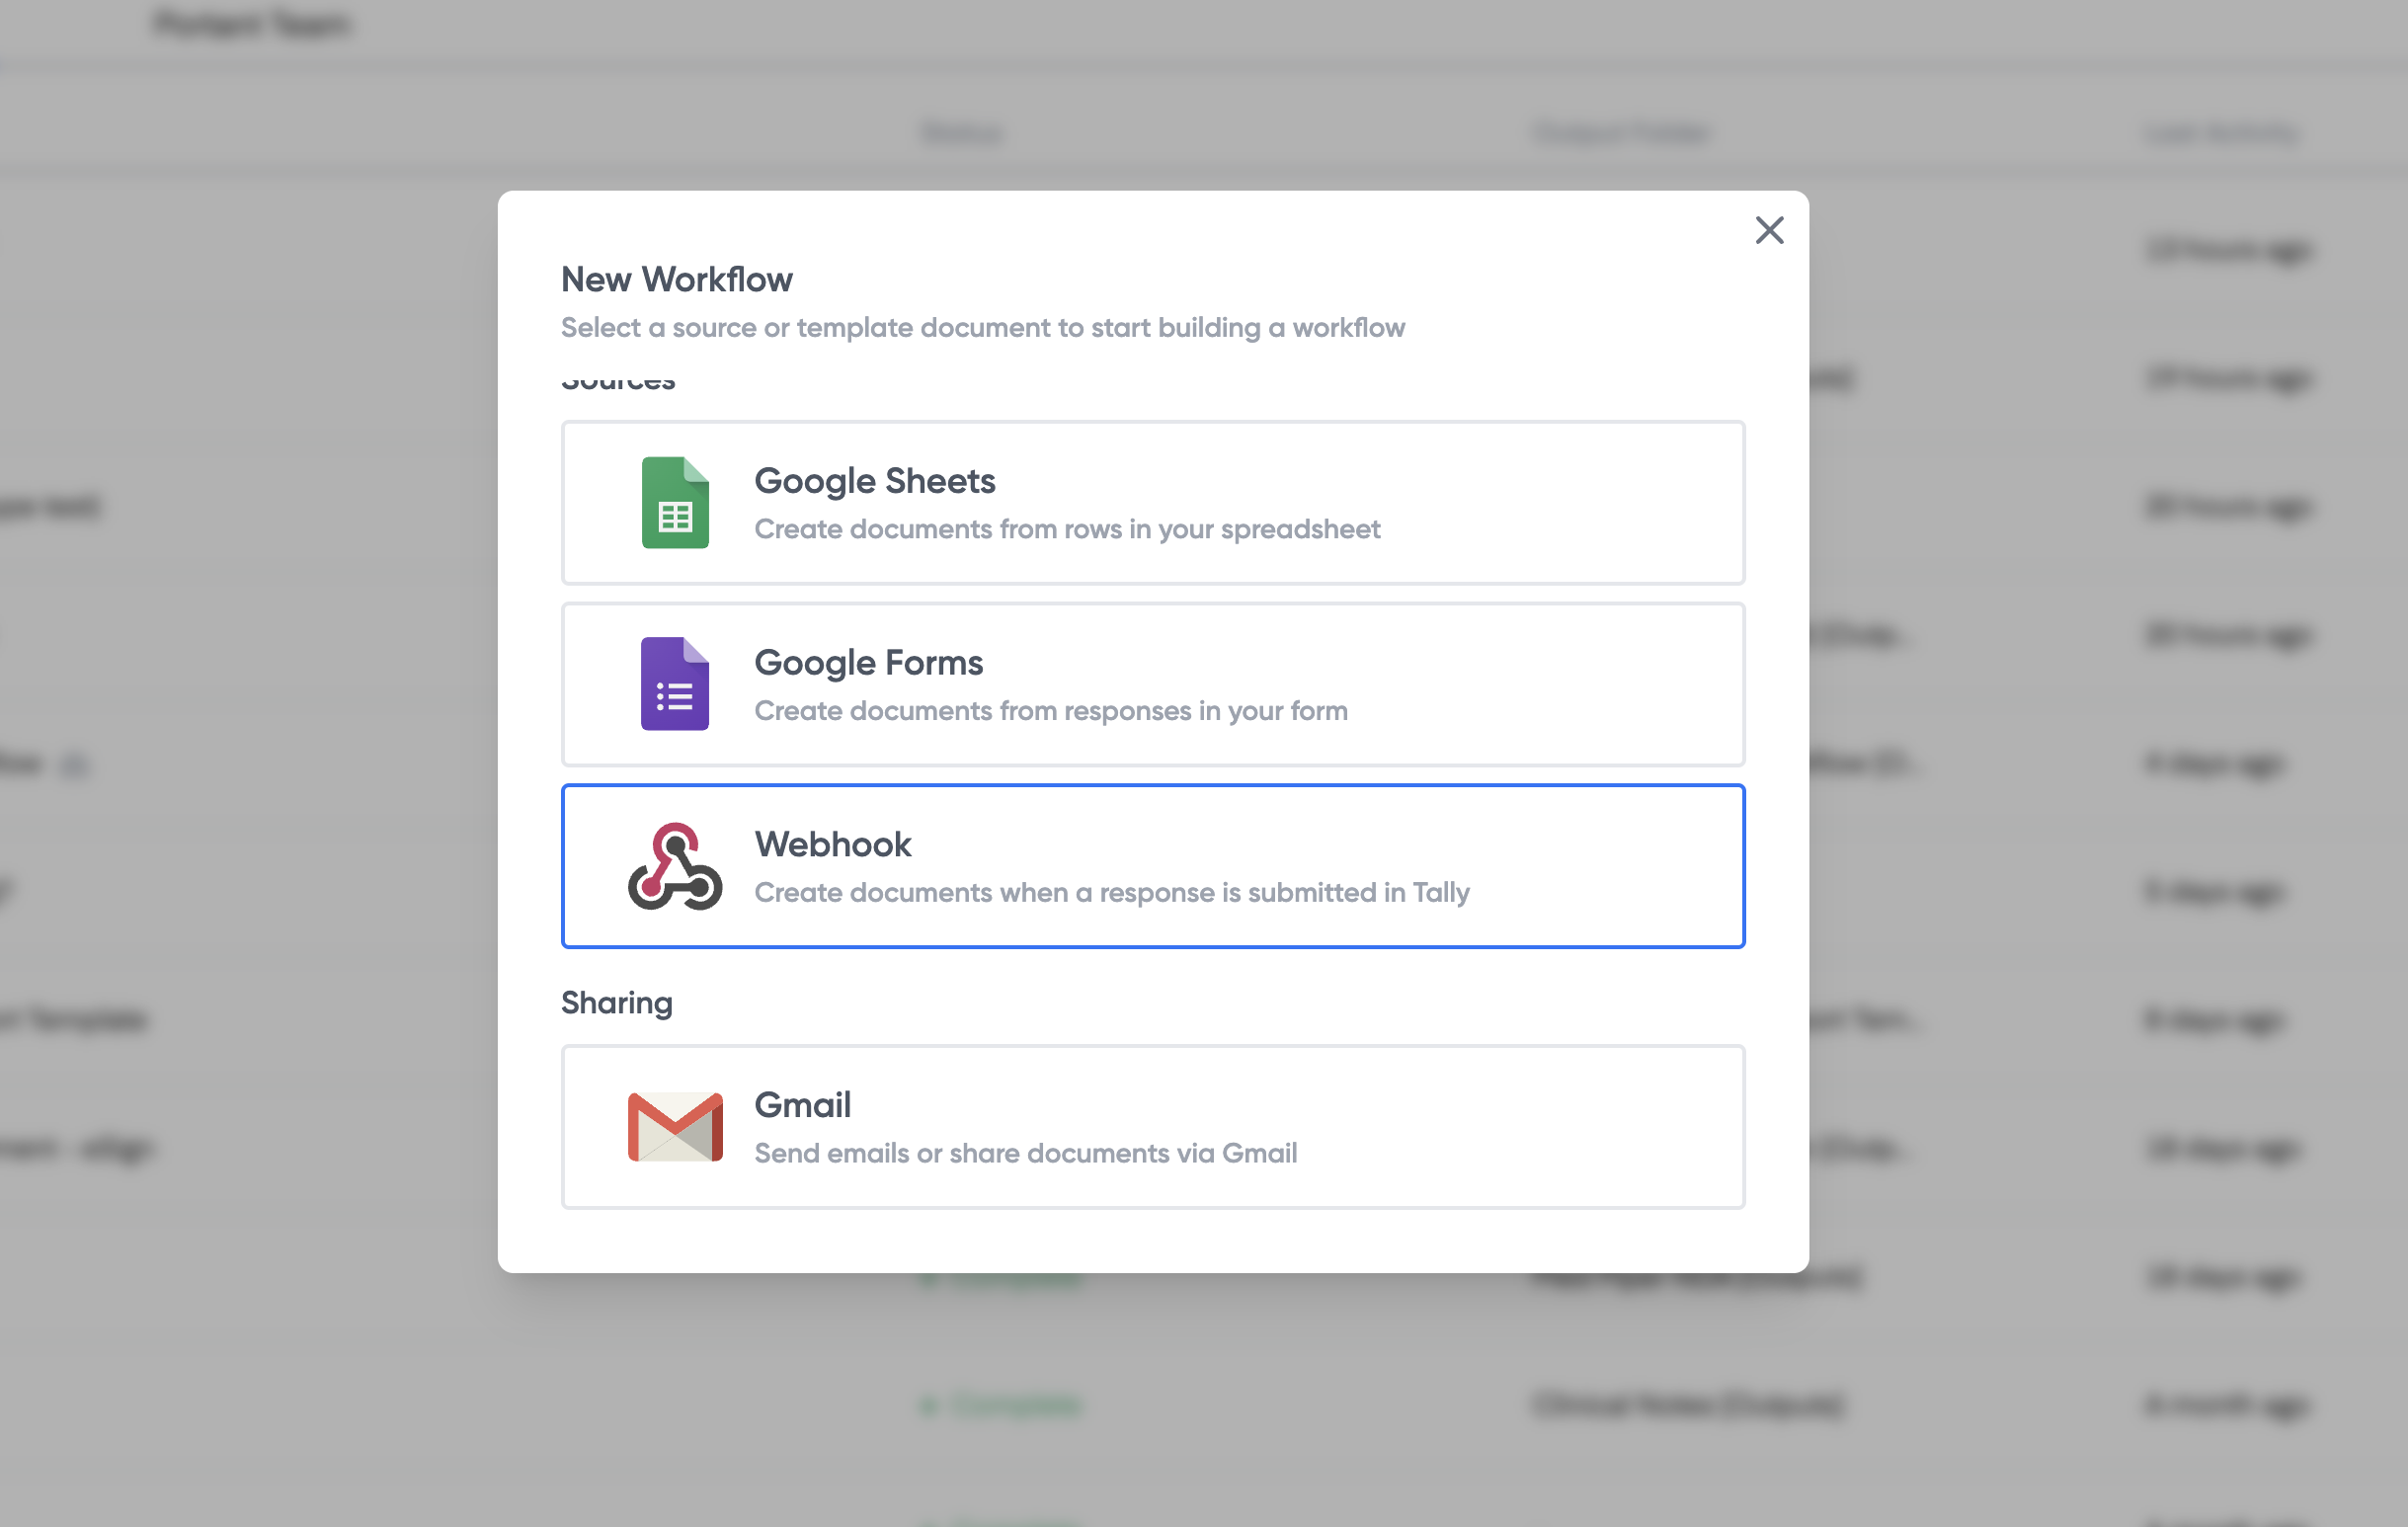
Pick webhooks as the workflow source
Click New Workflow, name it, then choose Use a webhook as the source.
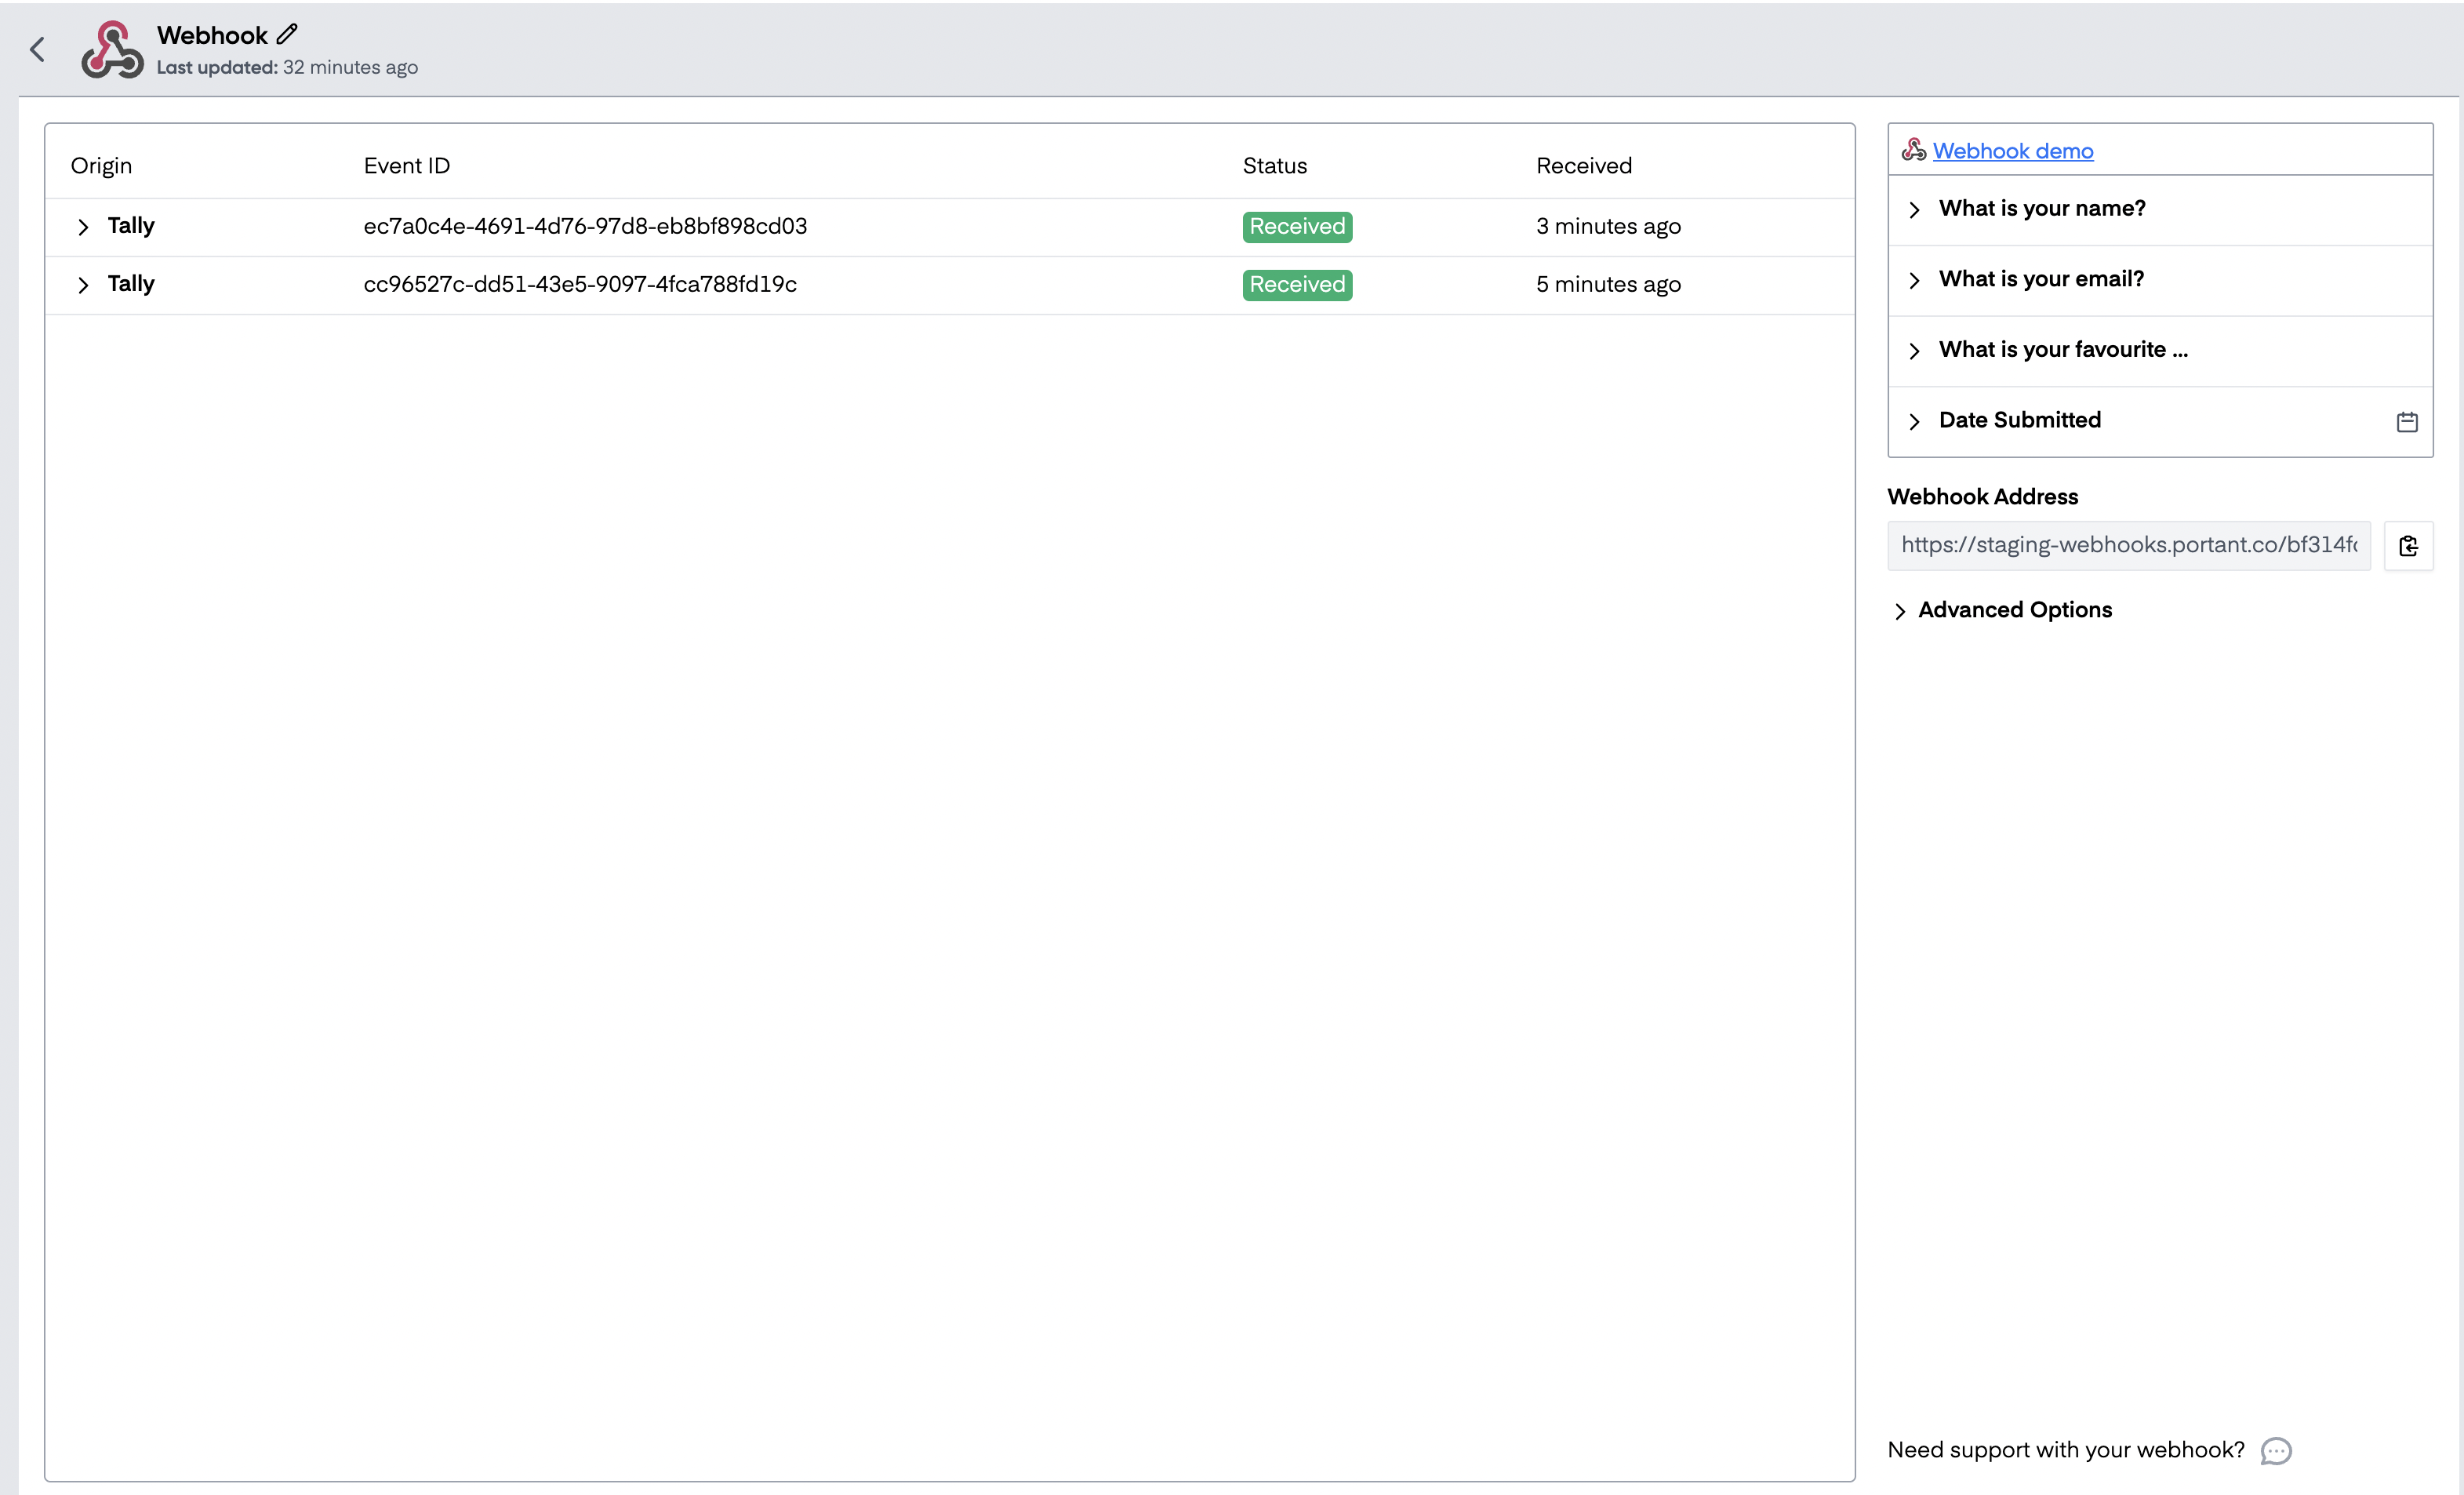
Get your webhook address
Portant generates a unique webhook URL for the workflow:

Copy it. You'll paste this into the other app.
Add the webhook address to the other app
Open the app you want to connect (Tally, Typeform, Zapier, etc.), find its webhook settings, and paste the URL in.
Webhook payload structure
Portant expects a JSON payload of key-value pairs. Here's an example:
{
    "article_id": "12345",
    "title": "Understanding Webhooks: A Guide to Key-Value Payloads",
    "author": "Jane Doe",
    "published_date": "2024-10-29T10:30:00Z",
    "content": "This article provides an in-depth look at how to use key-value pair payloads in webhooks...",
    "category": "Tech Guides",
    "url": "https://example.com/articles/webhooks-key-value-payloads",
    "summary": "An introductory article about key-value pairs in webhook payloads, intended for developers.",
    "nestedArray": [
        {
            "nestedFieldName1": "nestedValue1",
            "nestedFieldName2": "nestedValue2"
        },
        {
            "nestedFieldName1": "nestedValue3",
            "nestedFieldName2": "nestedValue4"
        }
    ]
}
The nestedArray example also shows how to structure data for data grouping with webhooks, which lets you turn arrays of objects into rows in a table.
Send a test submission
Send a test payload before you build the rest of the workflow. Portant uses the first payload to build the source table, which is what you'll pull tags from when you customise the document.
You can either trigger a test from the other app, or send one manually.
Once a payload arrives, the webhook block shows submissions on the left and the fields it parsed on the right:
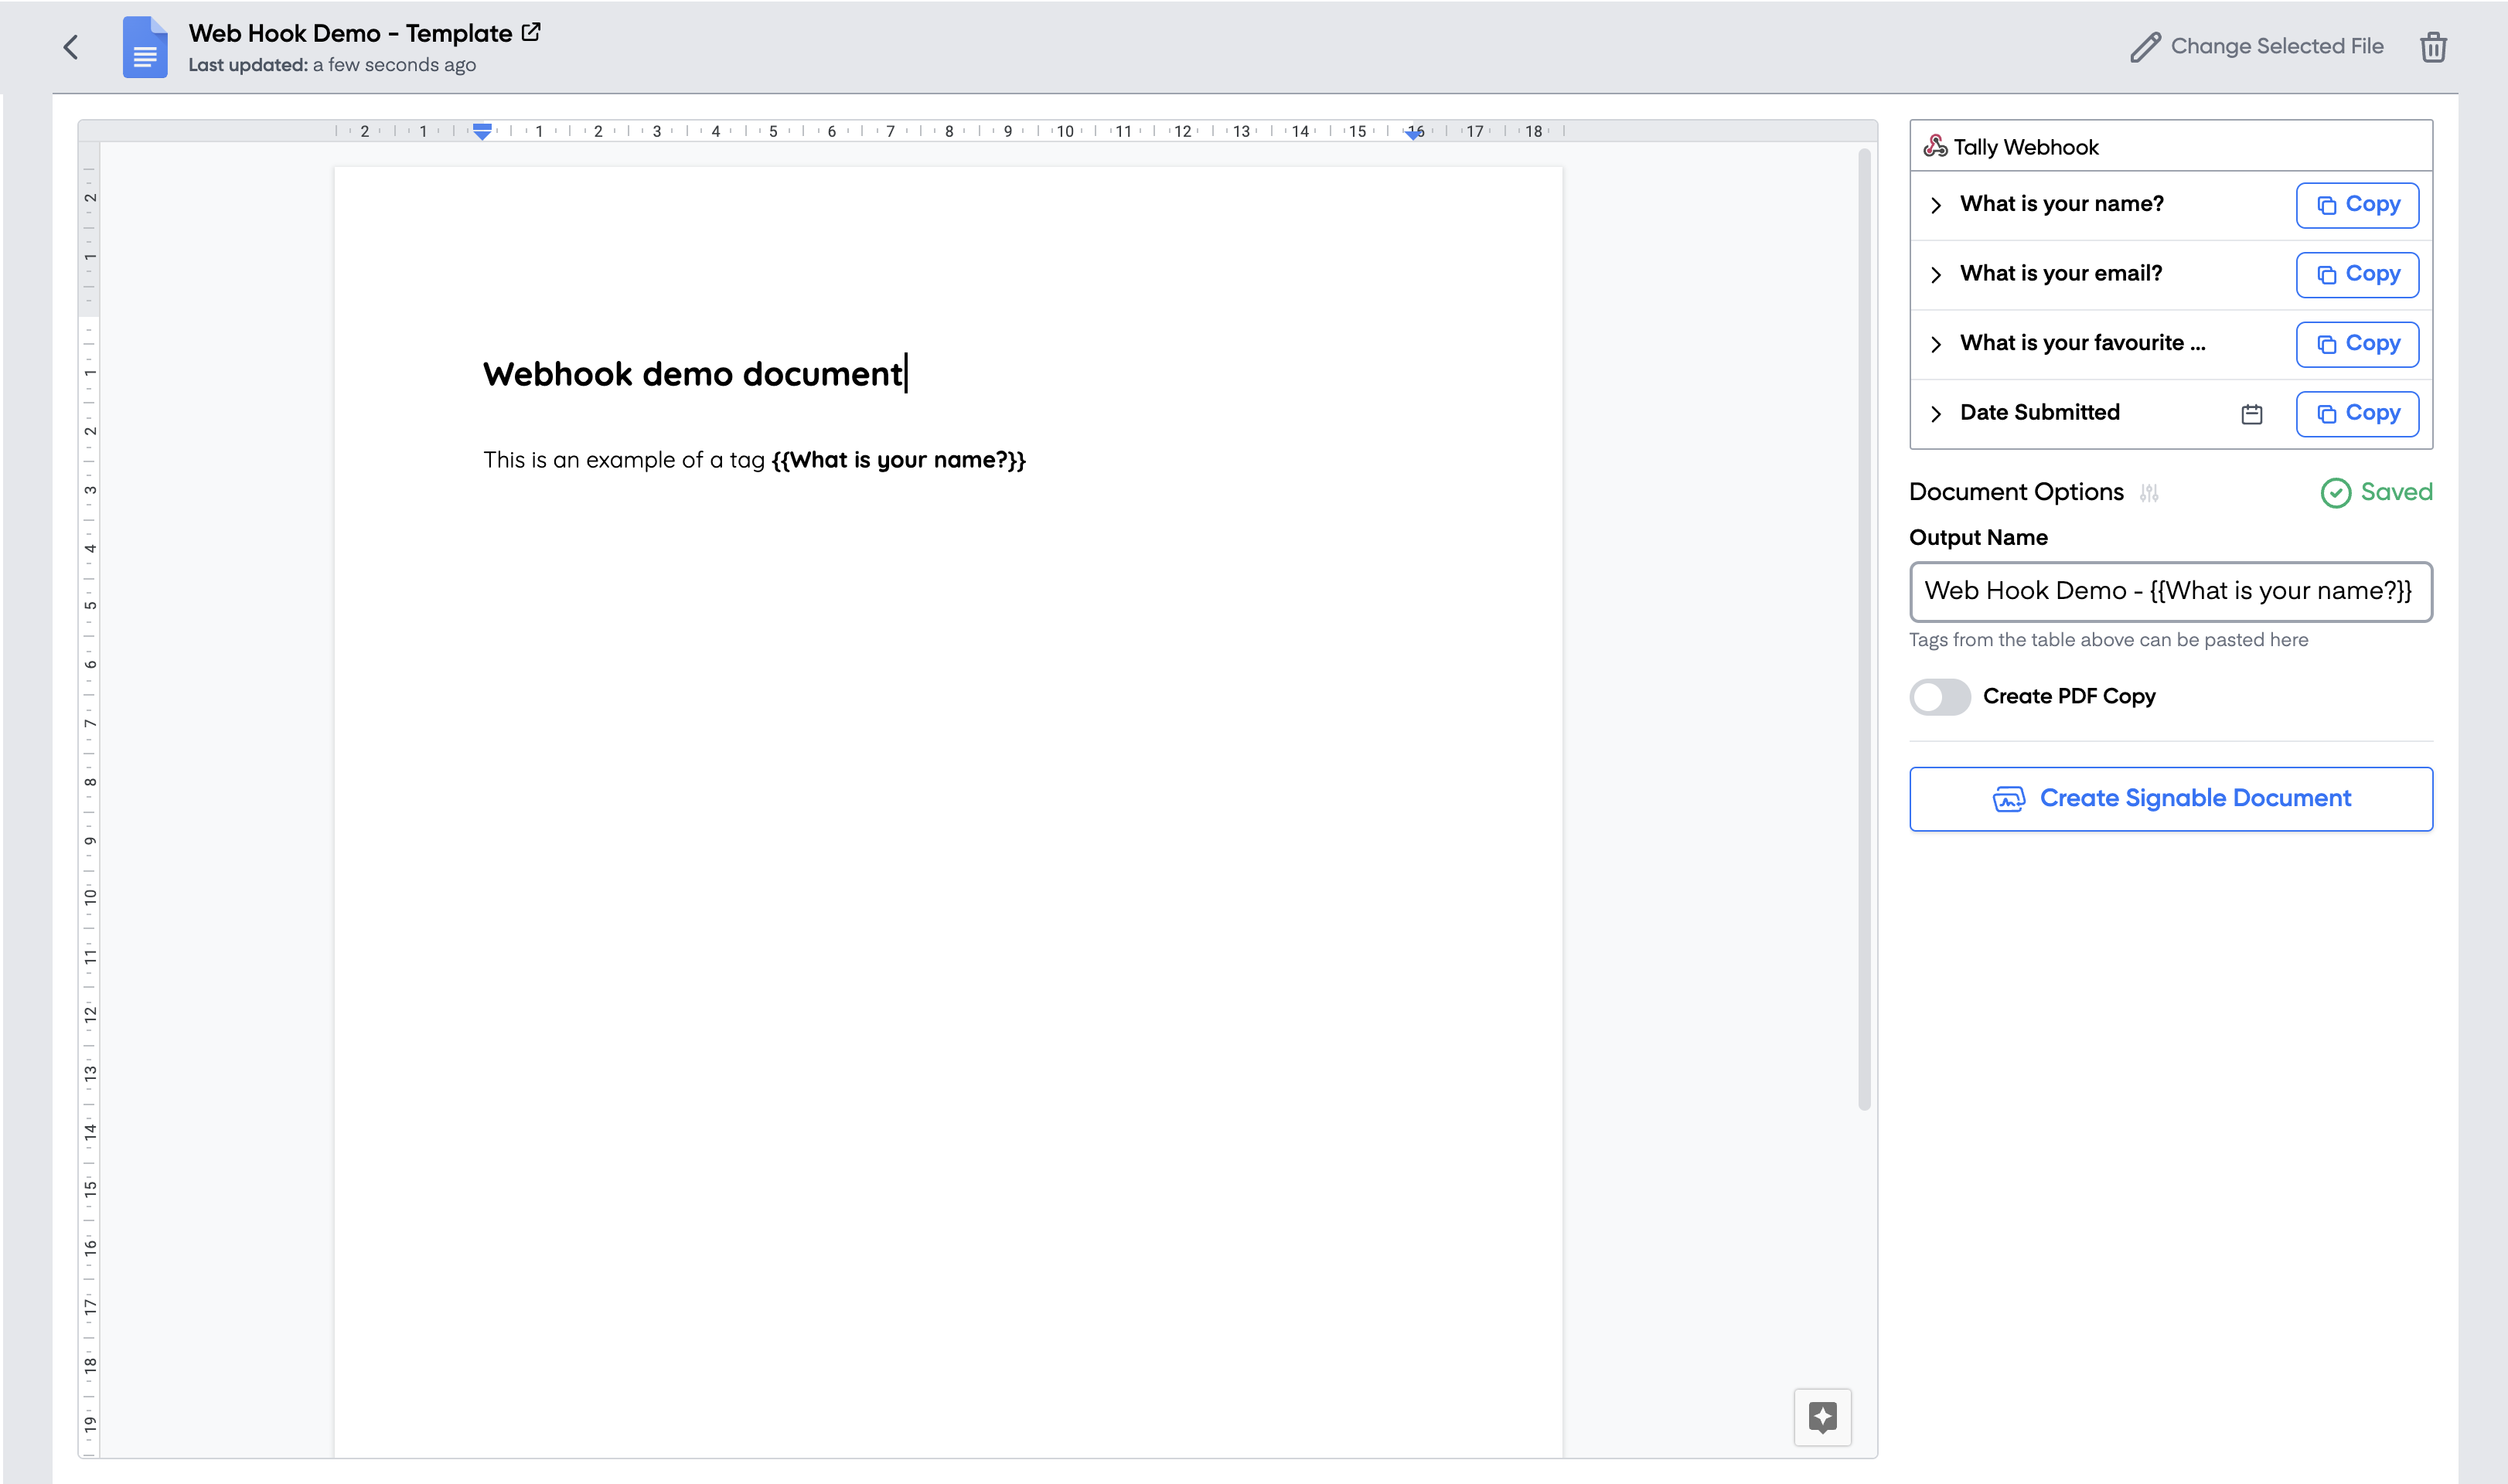
Build your document
Add a document, presentation or email block to the workflow. Use the fields from the webhook source table as tags inside the template:
Finish the workflow
Once everything is wired up, send another test payload to confirm the document looks right.
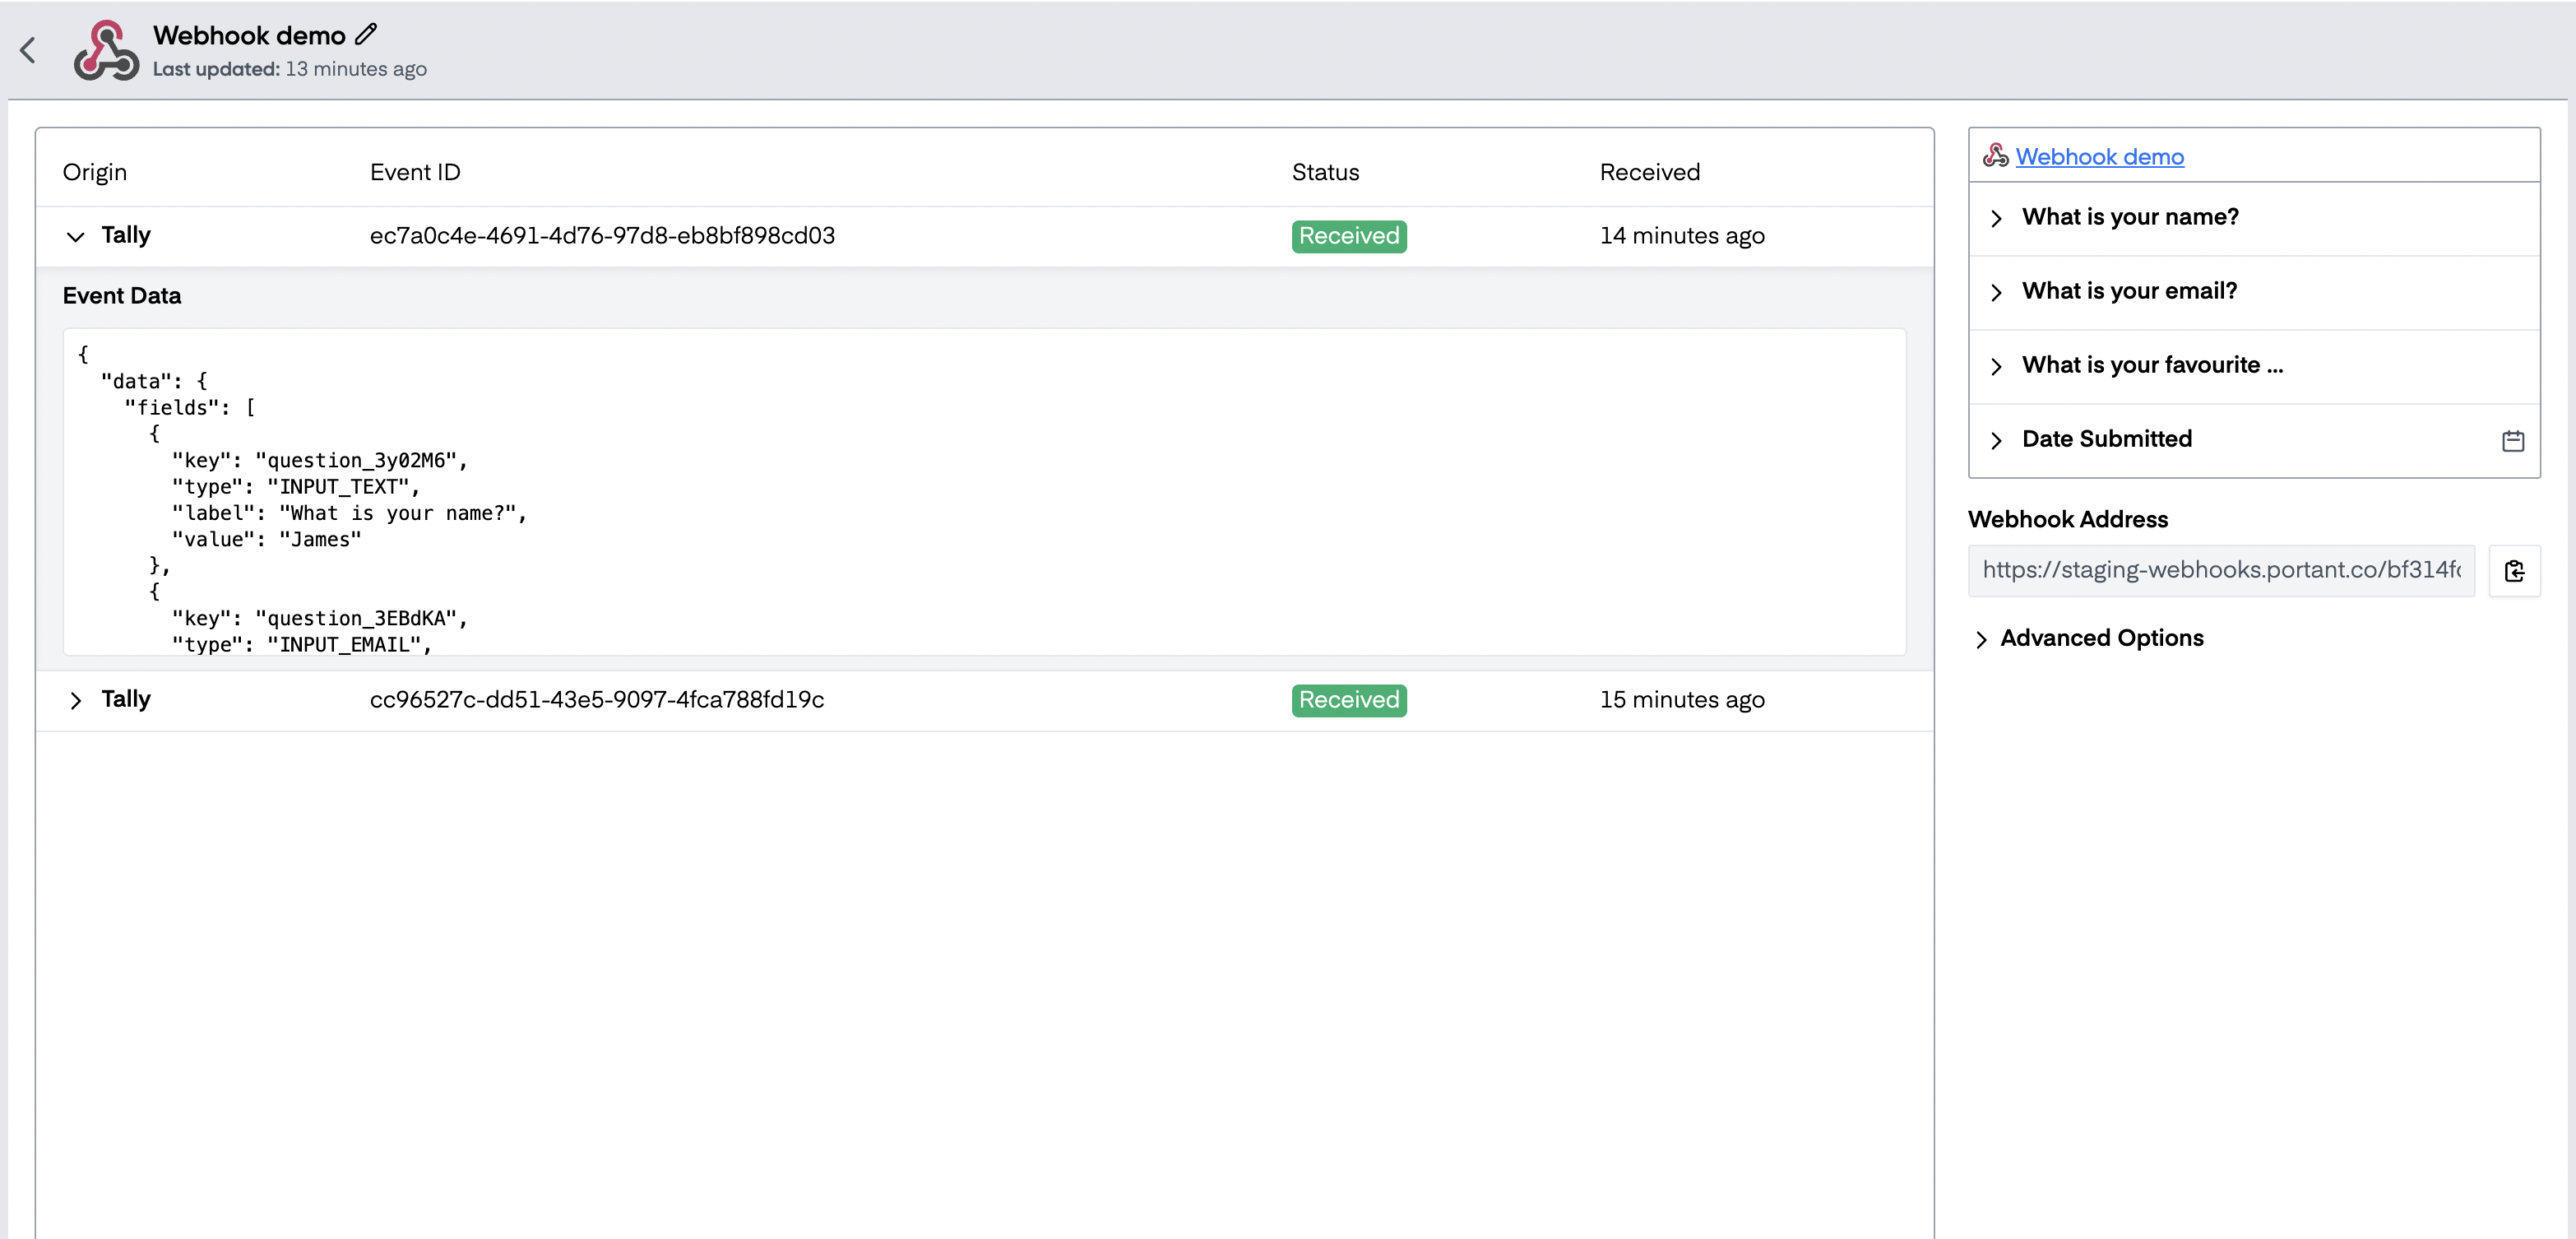
When the workflow is live, you can see incoming submissions in the webhook block and click into one to inspect its data:
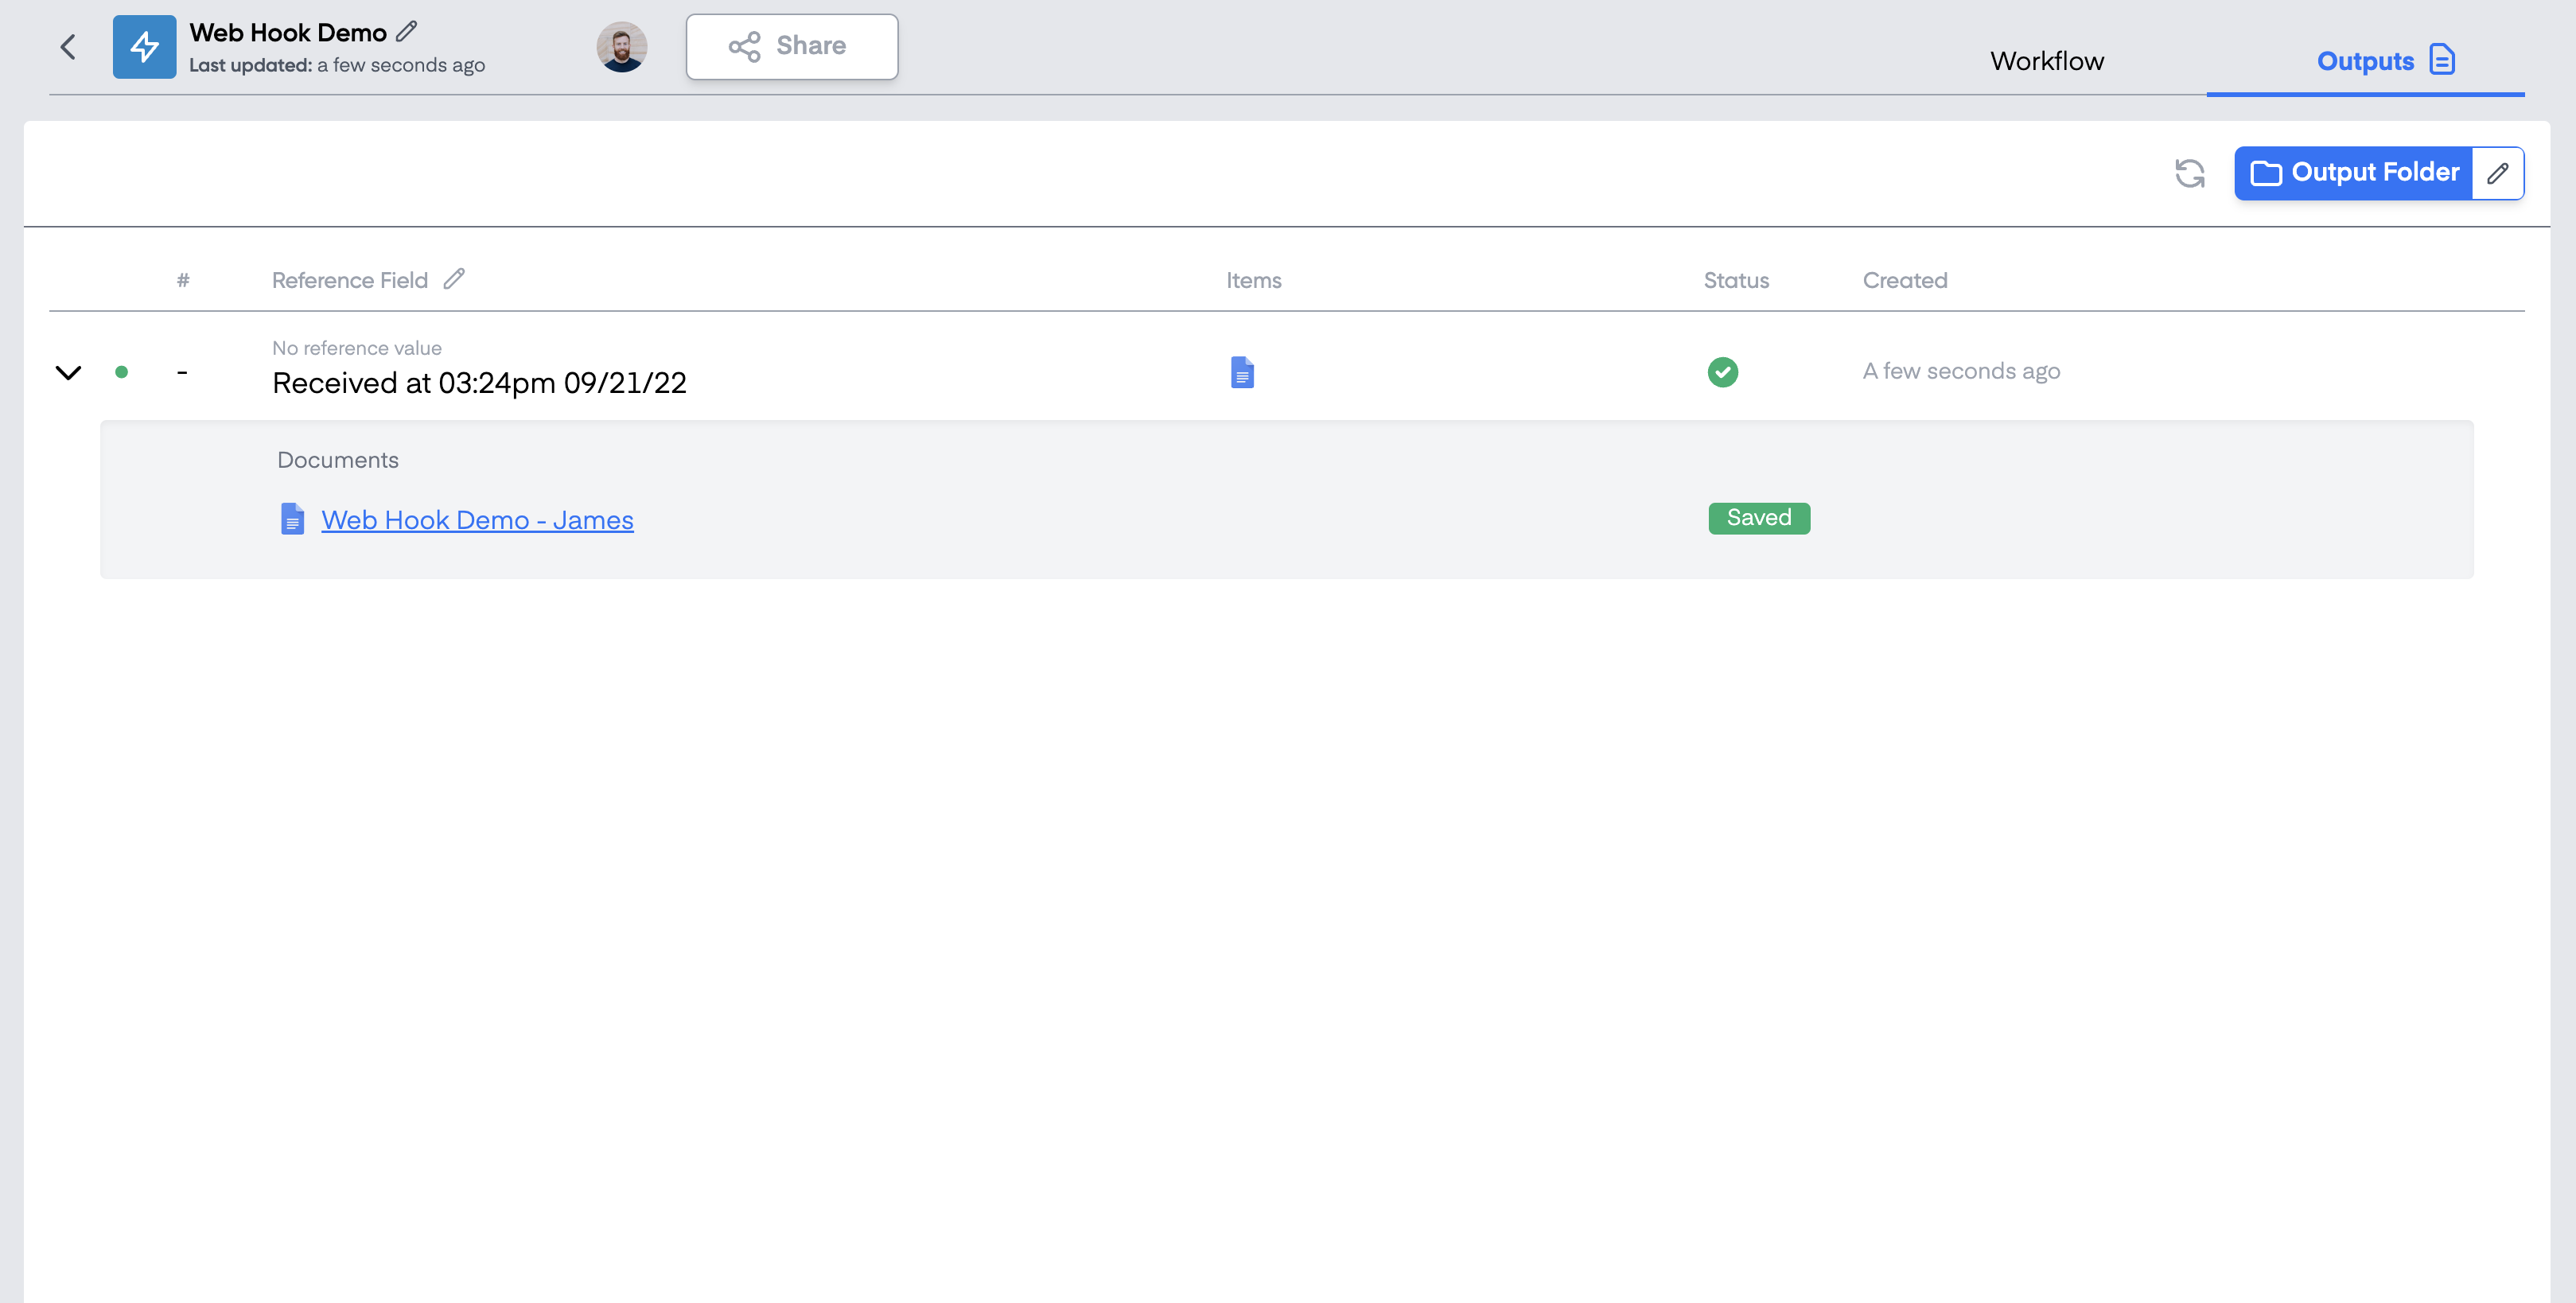
The output documents appear in the Outputs tab and are saved to a Google Drive folder:
That's it. You now have a workflow that creates a document every time another app fires a webhook.