Quickstart
Build your first Portant workflow in a few minutes. By the end of this page you'll have an automation that creates a PDF every time someone submits a Google Form, and emails the PDF to whoever you choose.
What you'll do
- Create a new workflow
- Pick a source for the workflow
- Add a document template and customise it with source data
- Email the generated document
- Turn the automation on
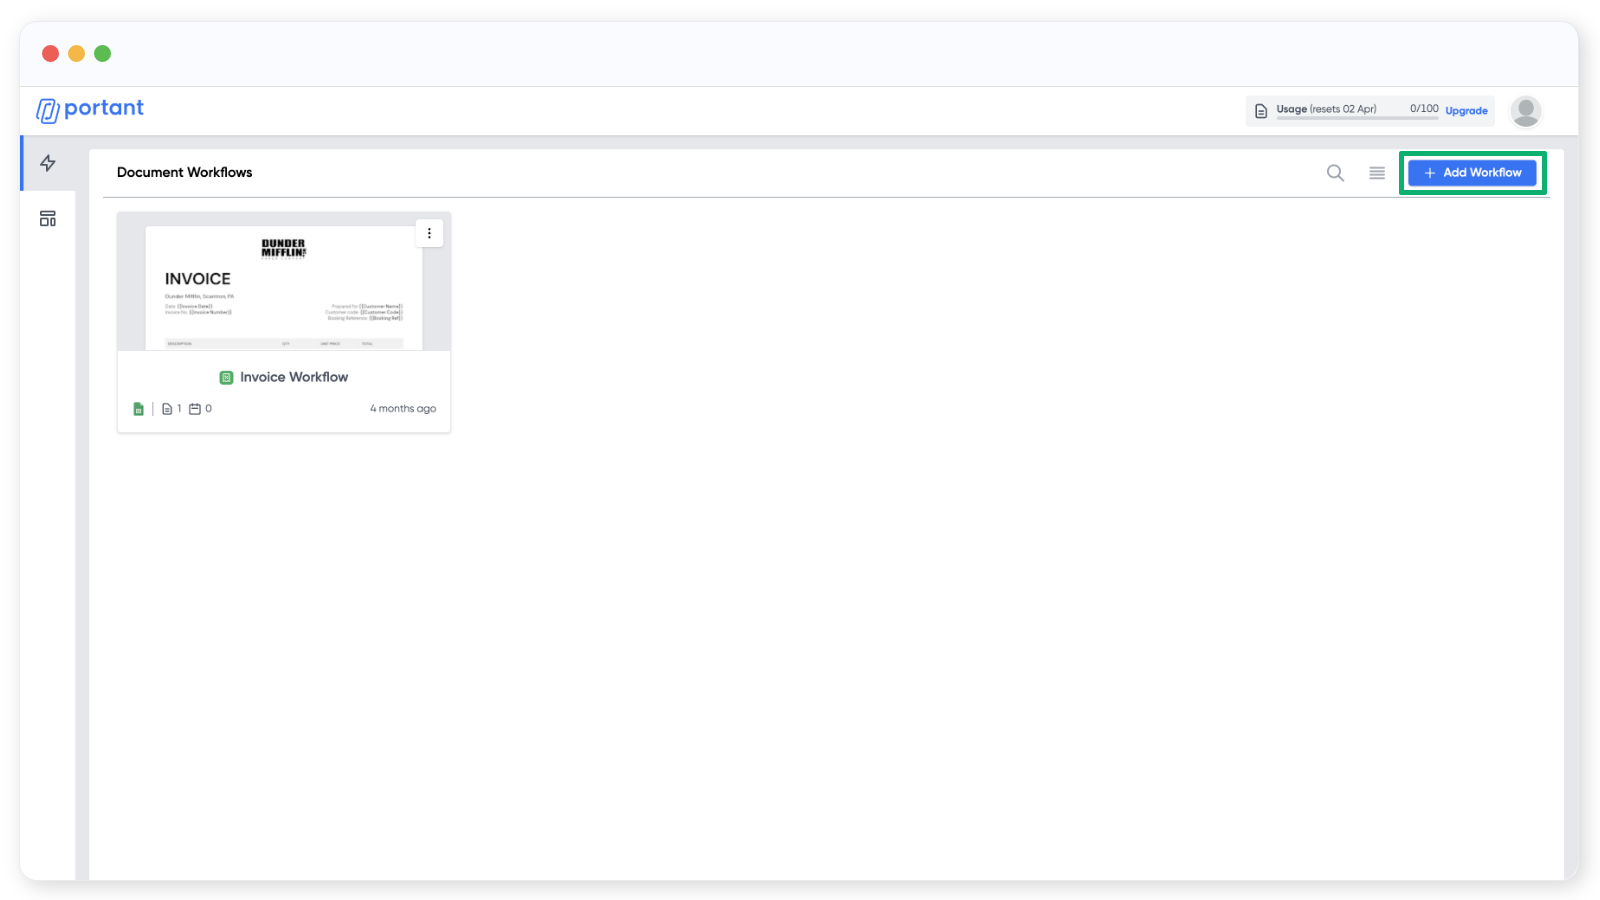
Create a new workflow
In the workflows page, click Add Workflow in the top right corner.
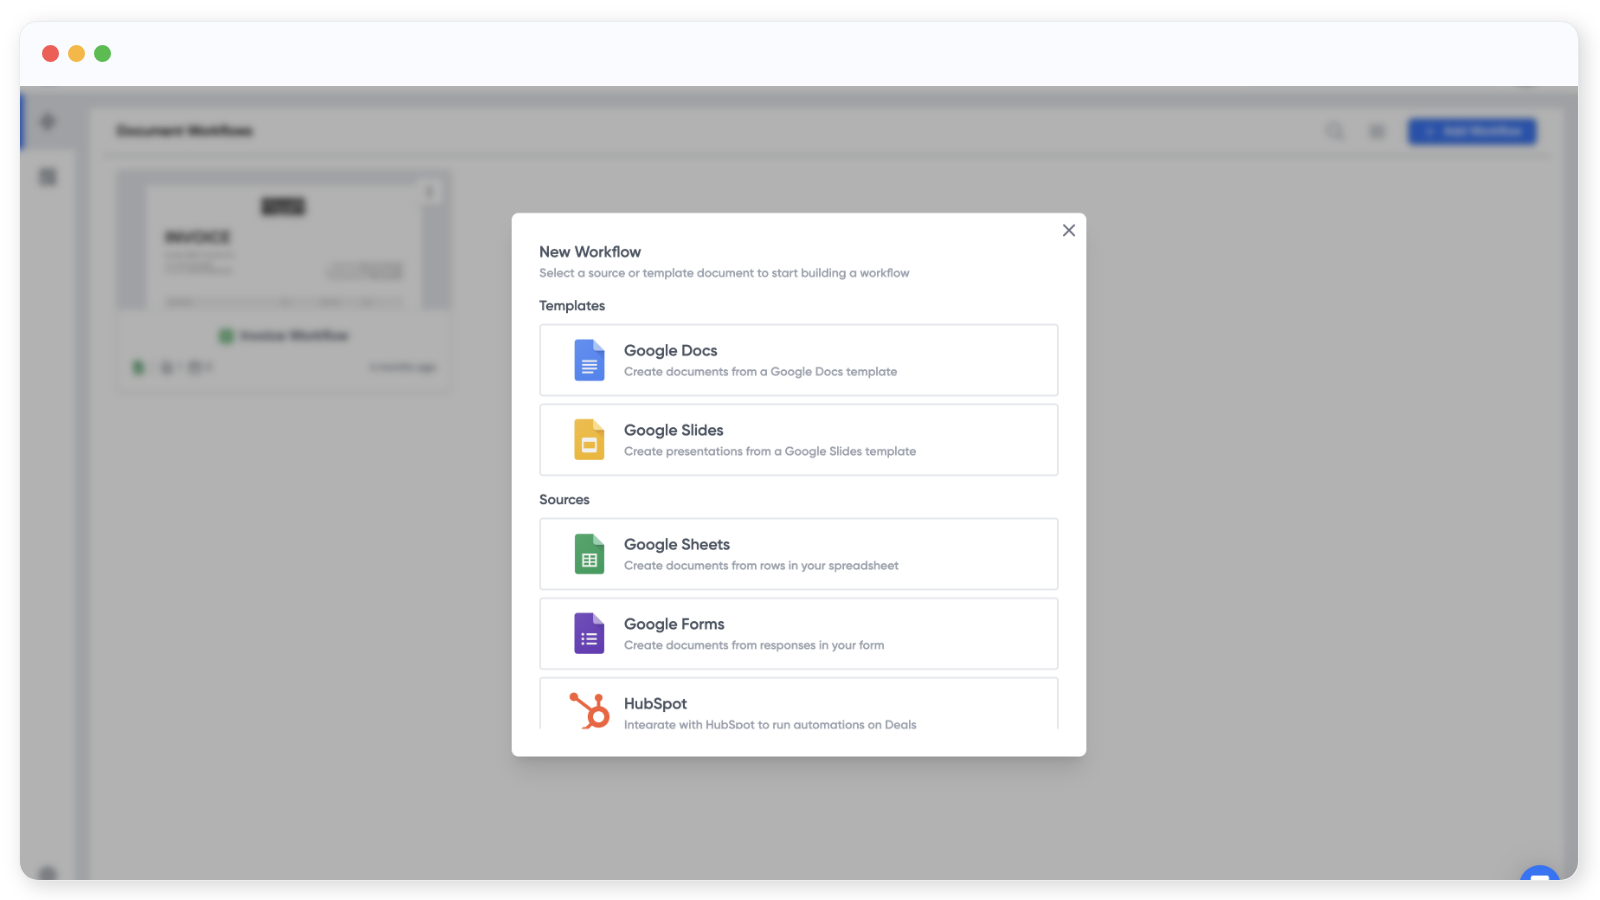
Pick a source
The first step in a new workflow is to choose a source. The source is where your data comes from. In this example we'll use a Google Form, but you can also start from a document template if you'd rather.
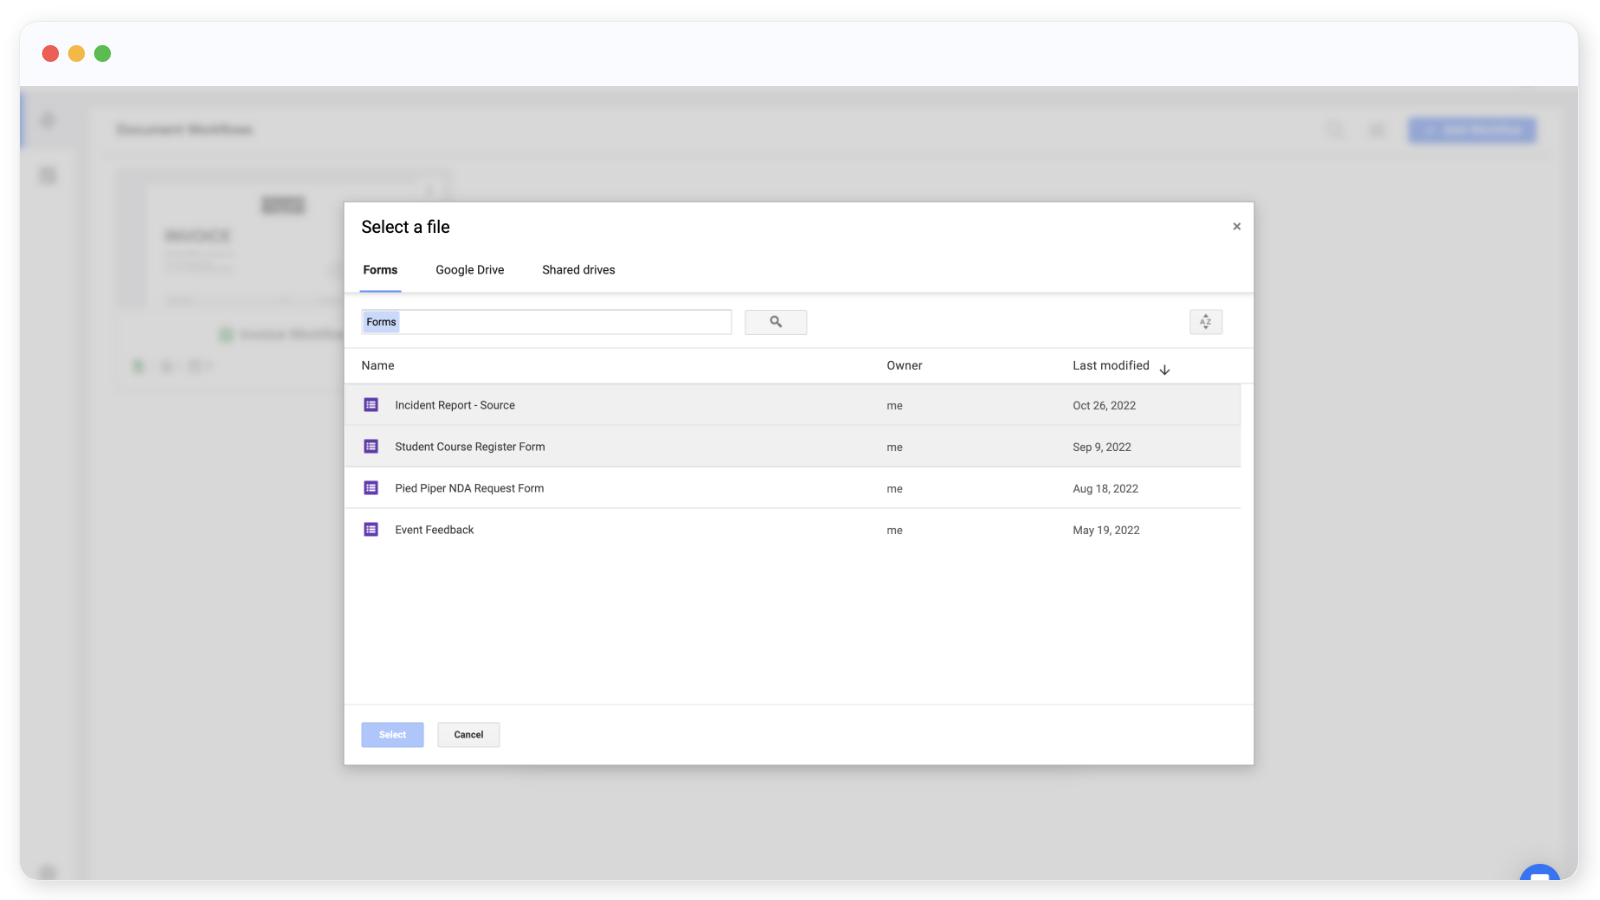
Pick a Google Form from your Drive, or let Portant create a new one for you.
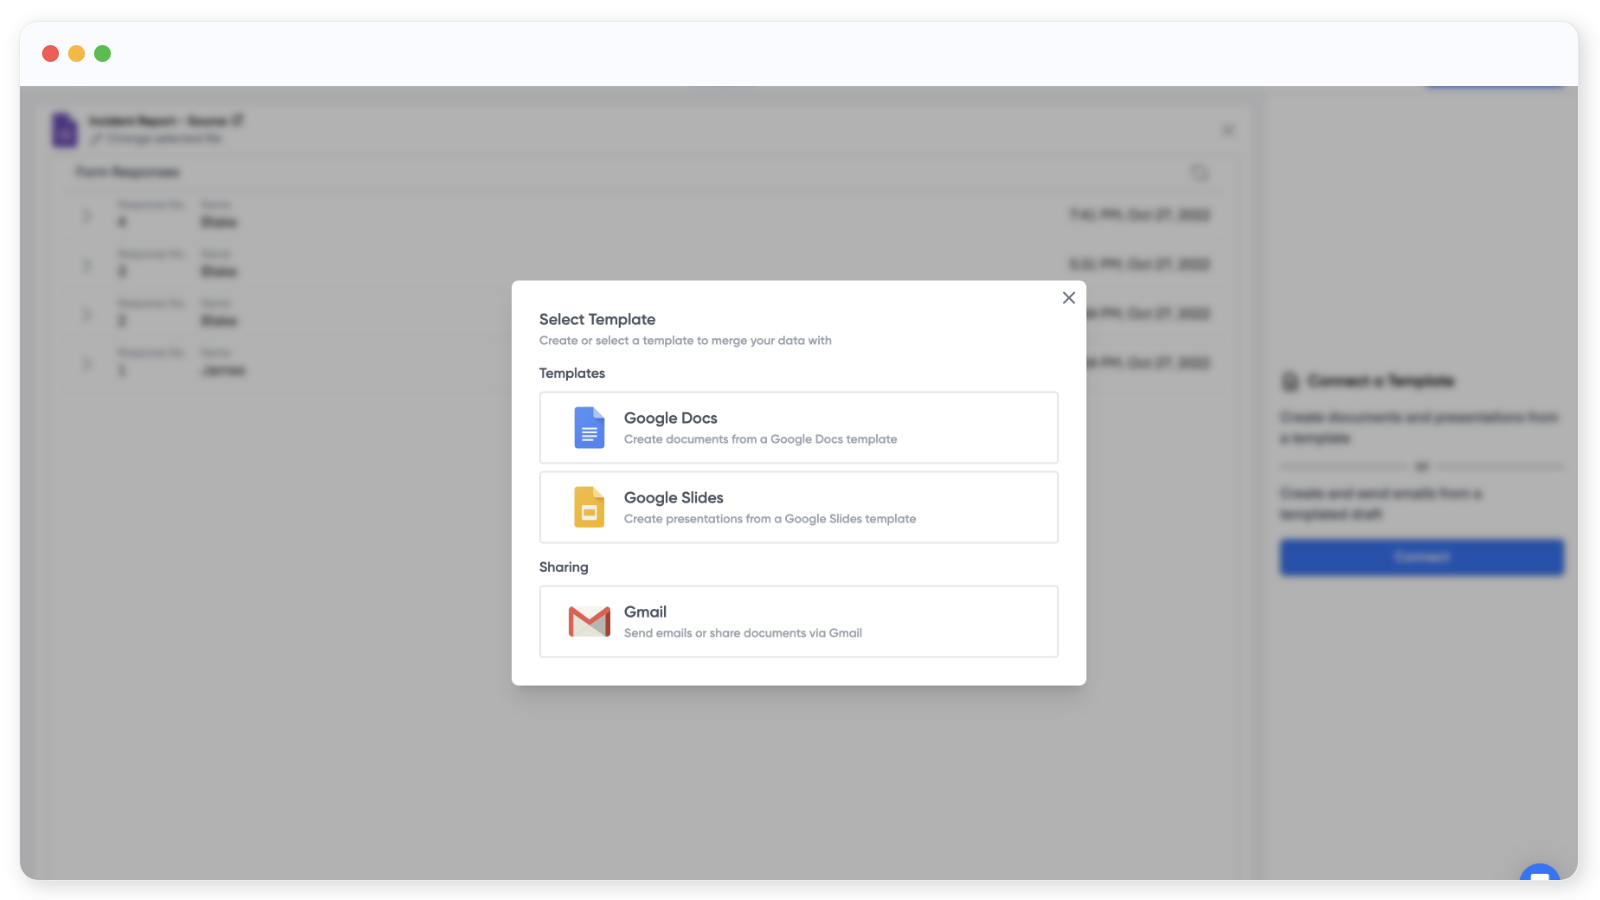
Once a form is selected, Portant shows the recent form responses. If there aren't any responses yet, this section stays empty. From here you can open the form to edit it, or copy the public link to share.
Click ✎ Change selected file under the form name to swap in a different Google Form.
Add a document template
Next, connect the document you want Portant to fill in for each form response. Click Connect on the right hand side.

You can use a Google Doc or a Google Slides file as your template. As before, pick an existing file or create a new one.
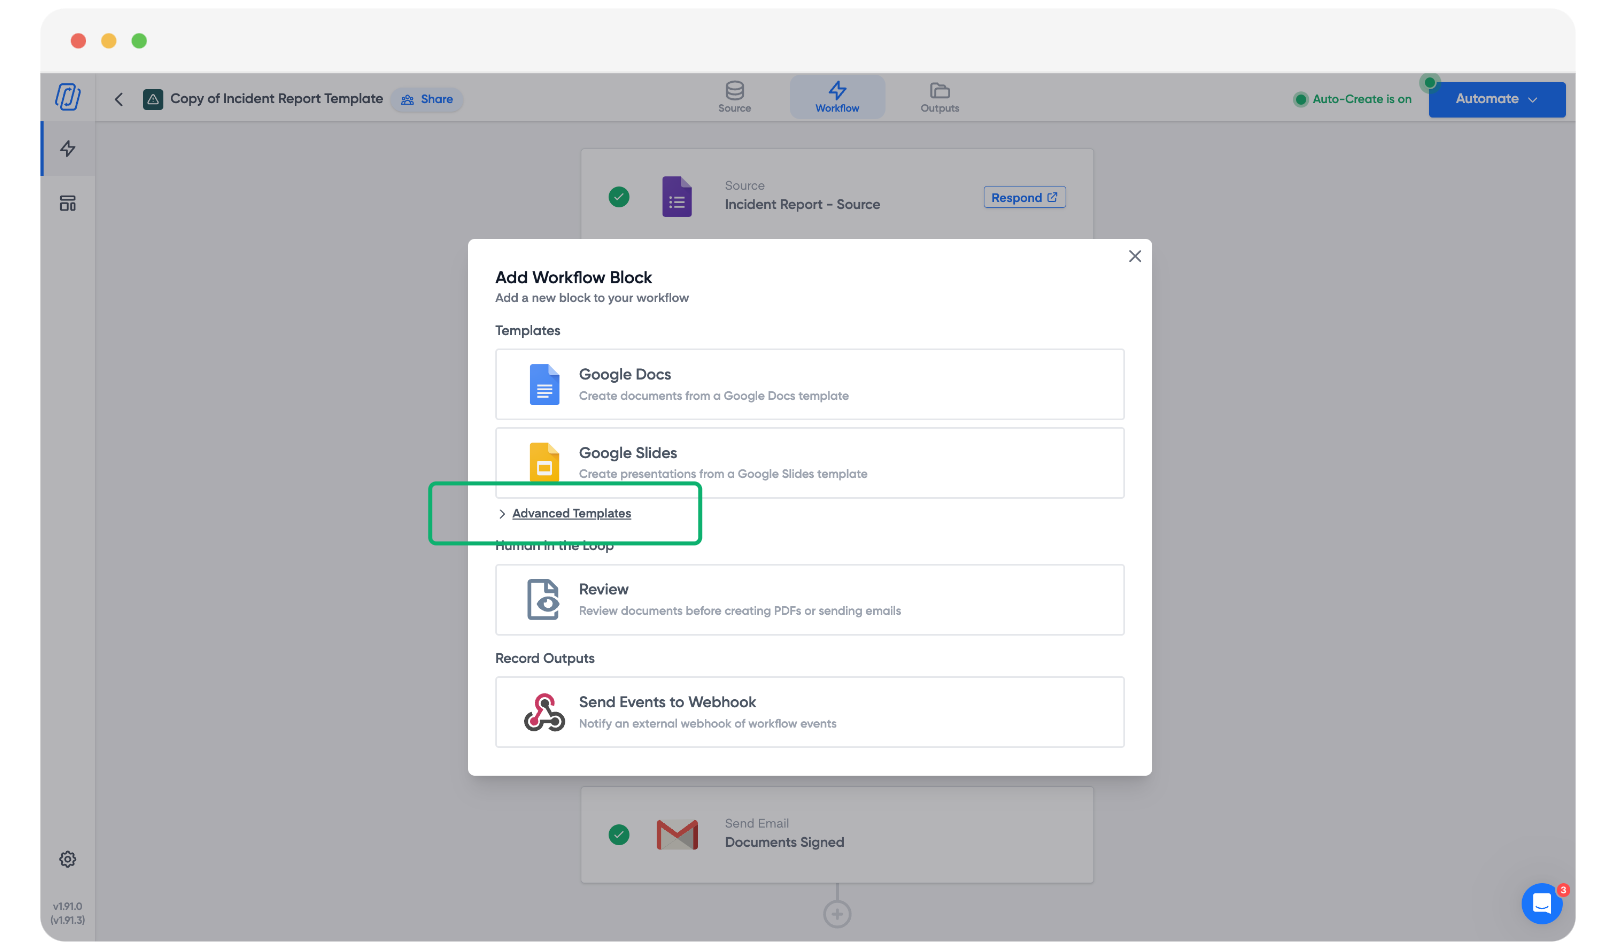
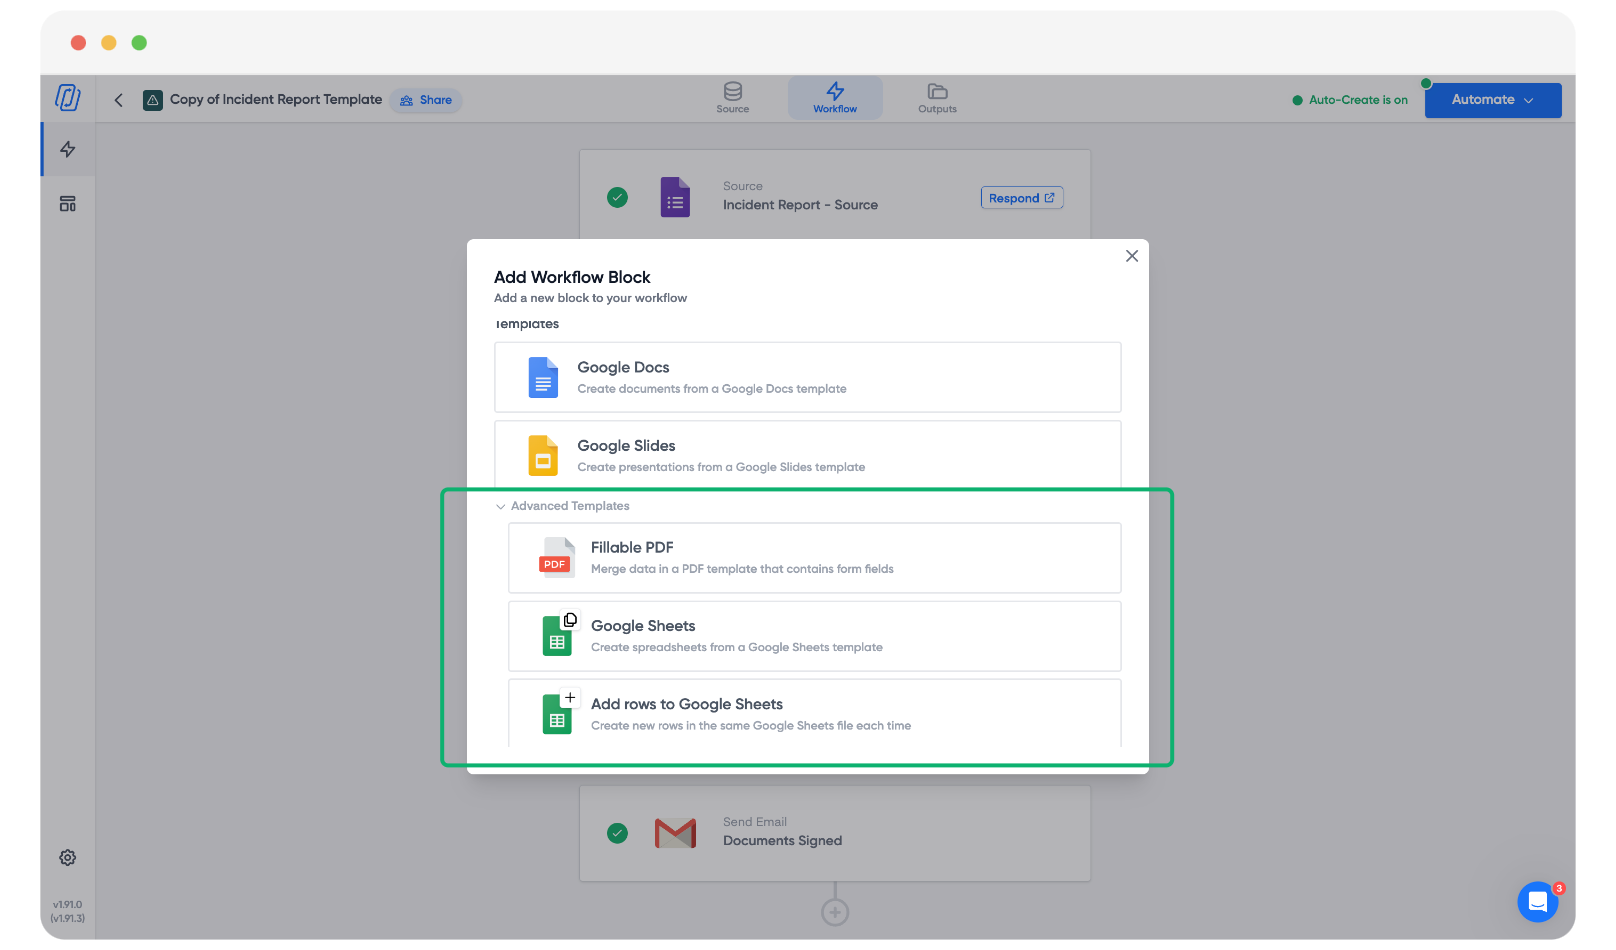
You can also generate an email directly from the source, or use templates like fillable PDFs or Google Sheets. Click Advanced Options to see the full list.
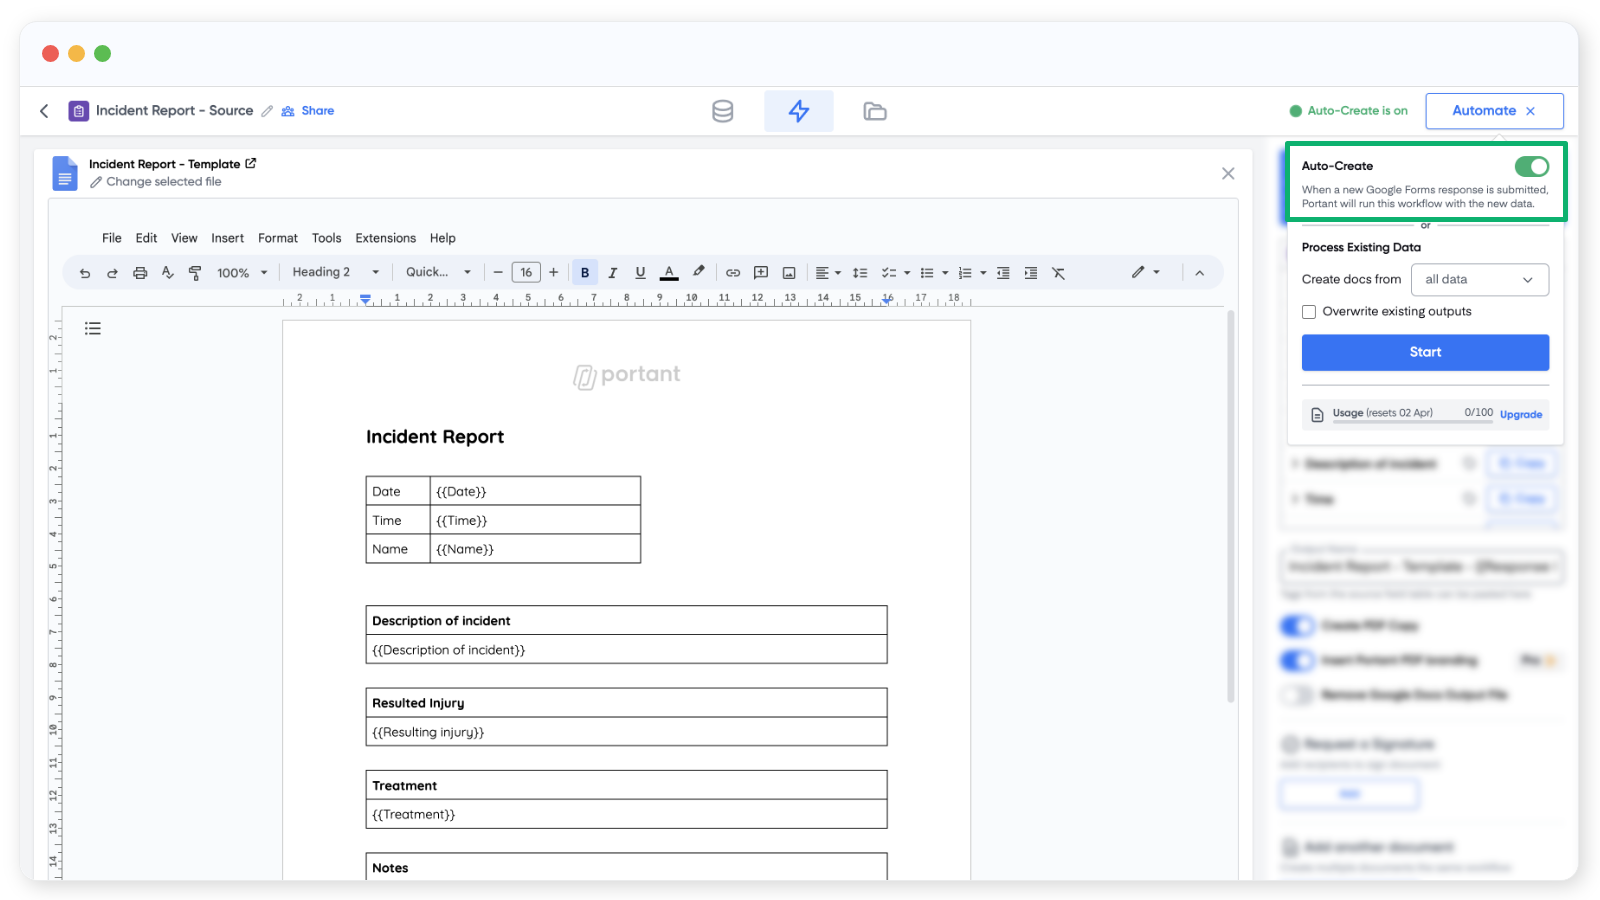
When you've selected your template, Portant opens it so you can drop form answers into the document.
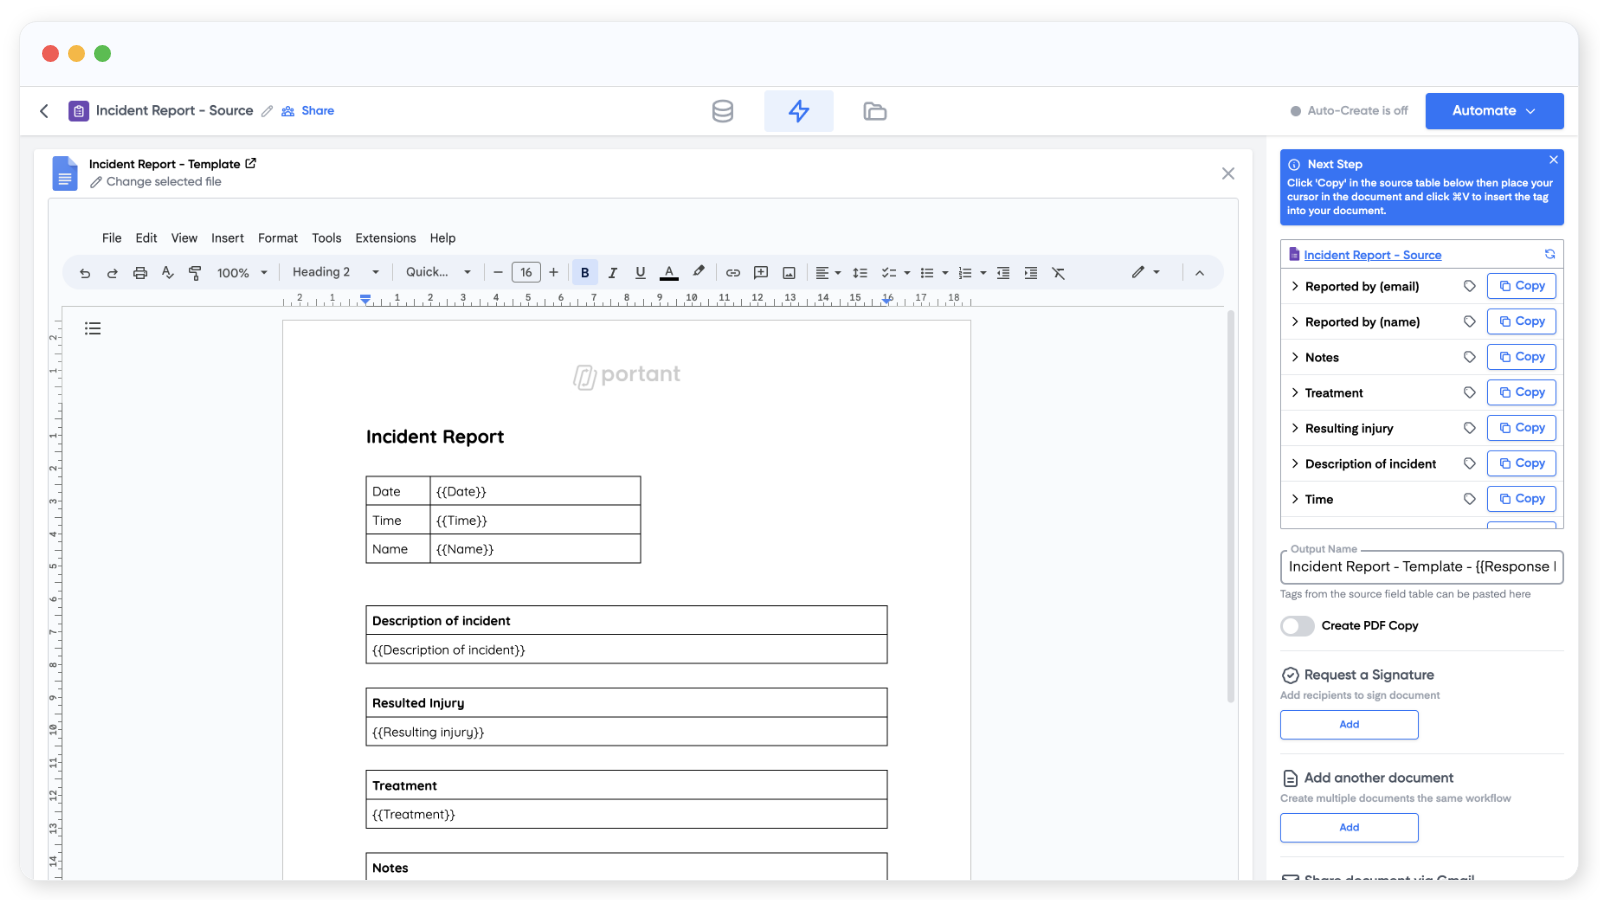
The table in the top right of the page lists every question in your form. We call this the source table.
To place an answer into the document, copy the {{tag}} from the source table and paste it where you want the answer to appear.
You can also add image tags to documents and presentations, and customise individual tags by clicking on the row.
When the document is set up, name the output files by adding tags to the Output Name field.
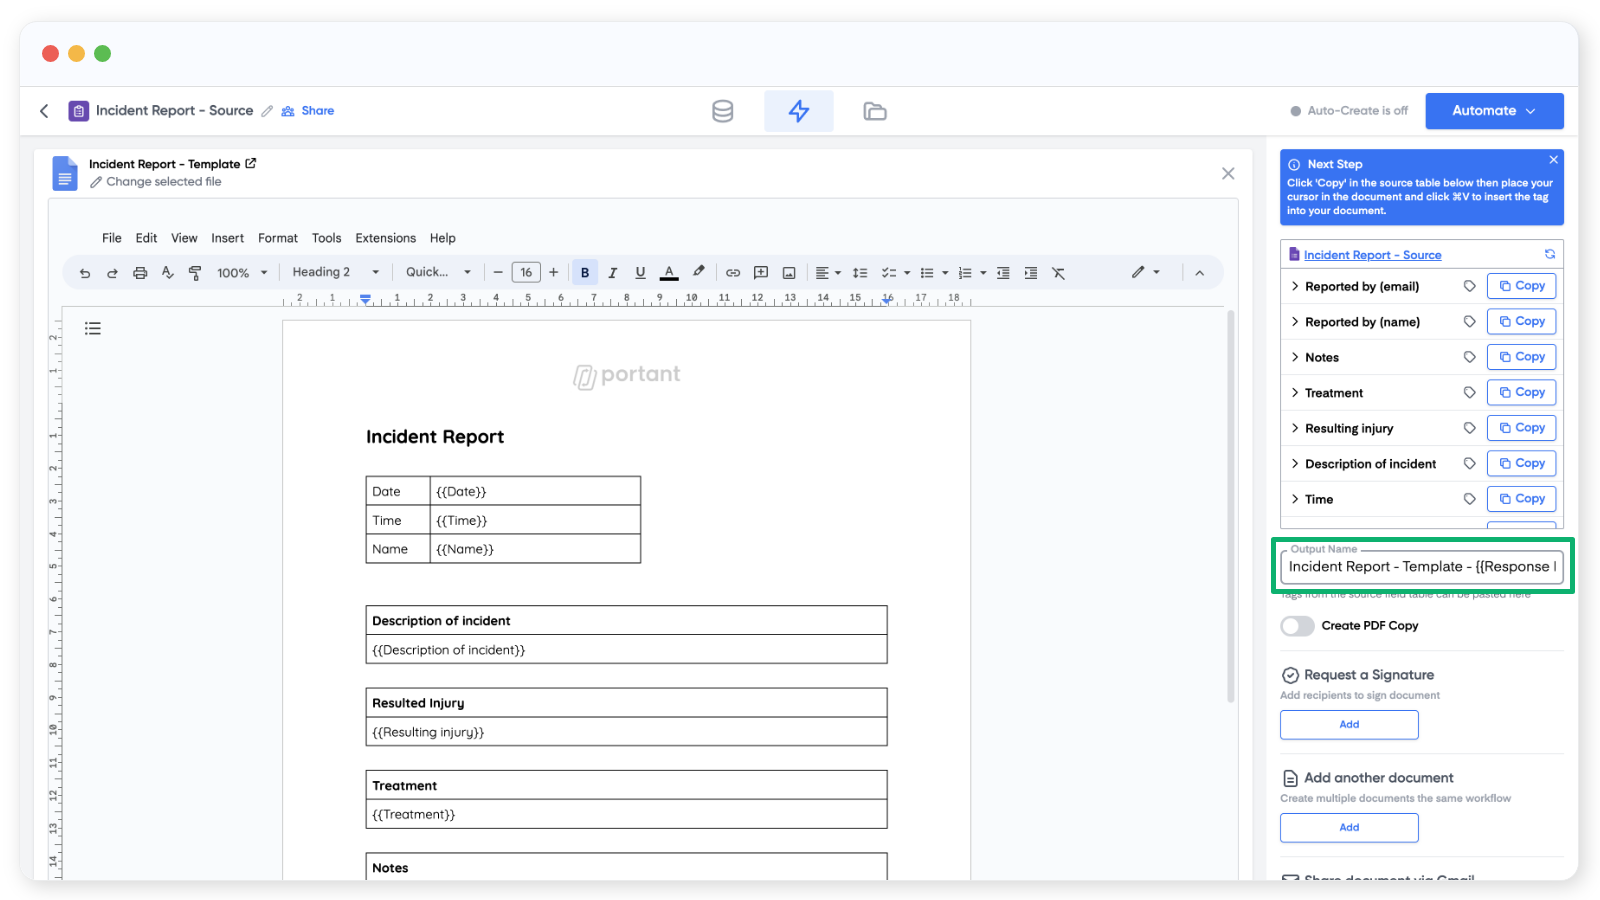
Below the output name field, you can also choose to save each output as a PDF.
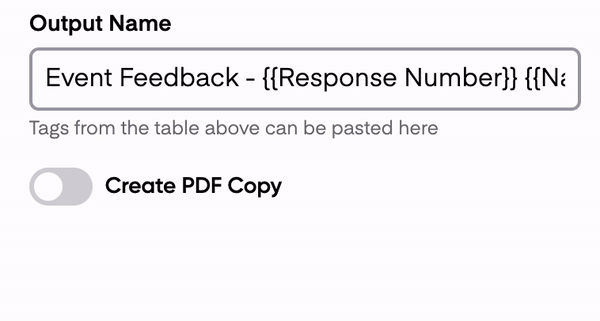
On the Free plan, a Portant watermark is added to the PDF footer. You can remove the watermark by upgrading to Pro or Teams.
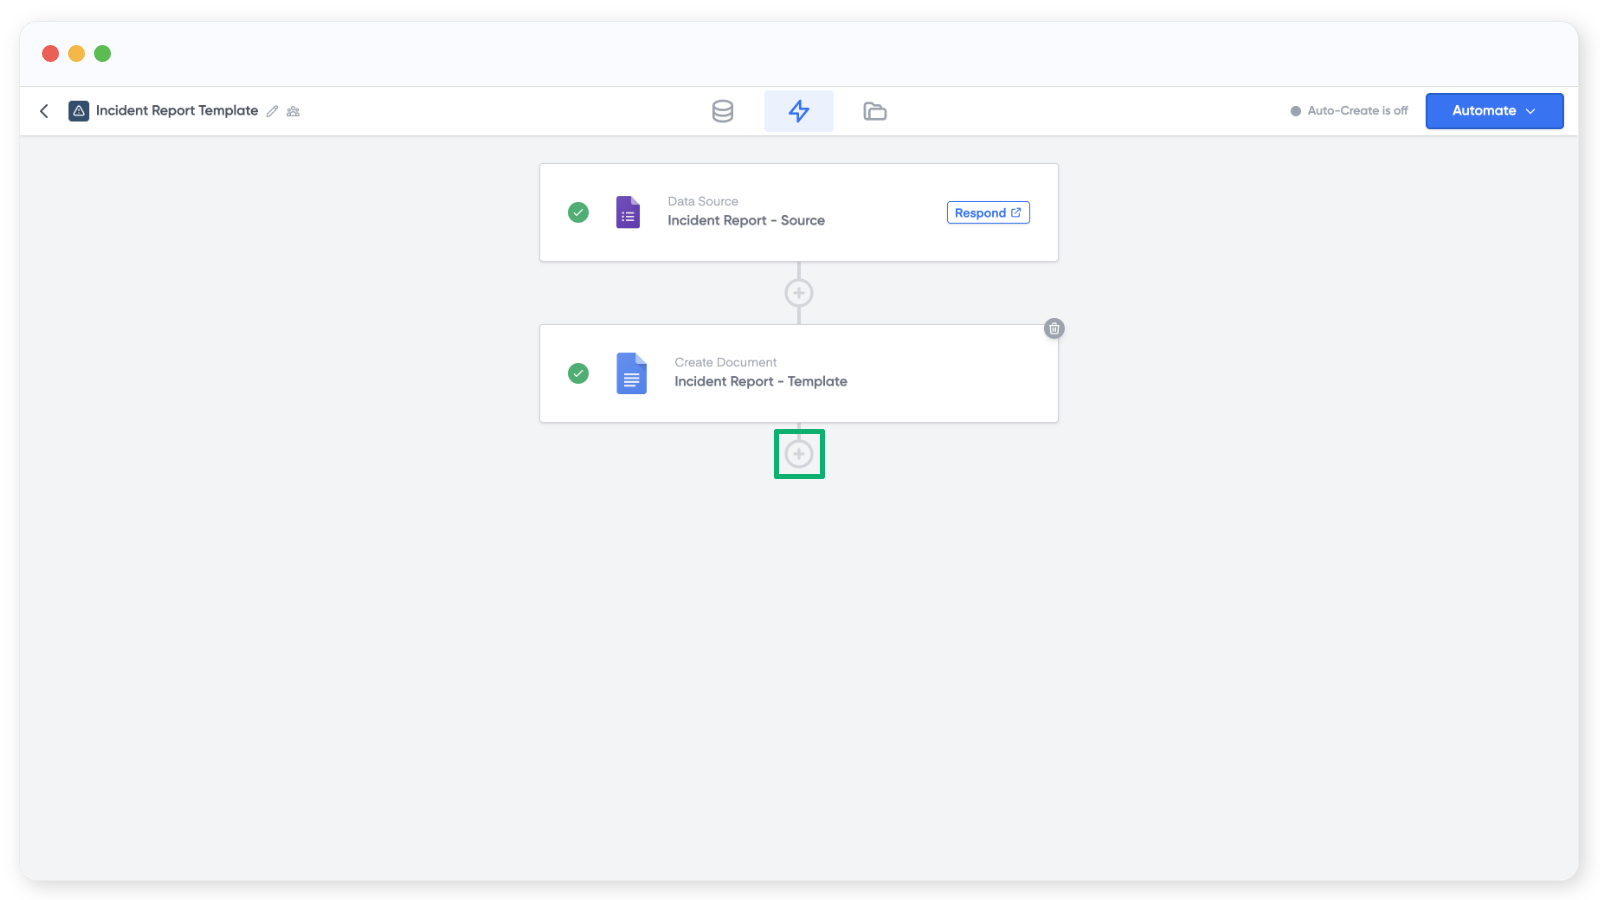
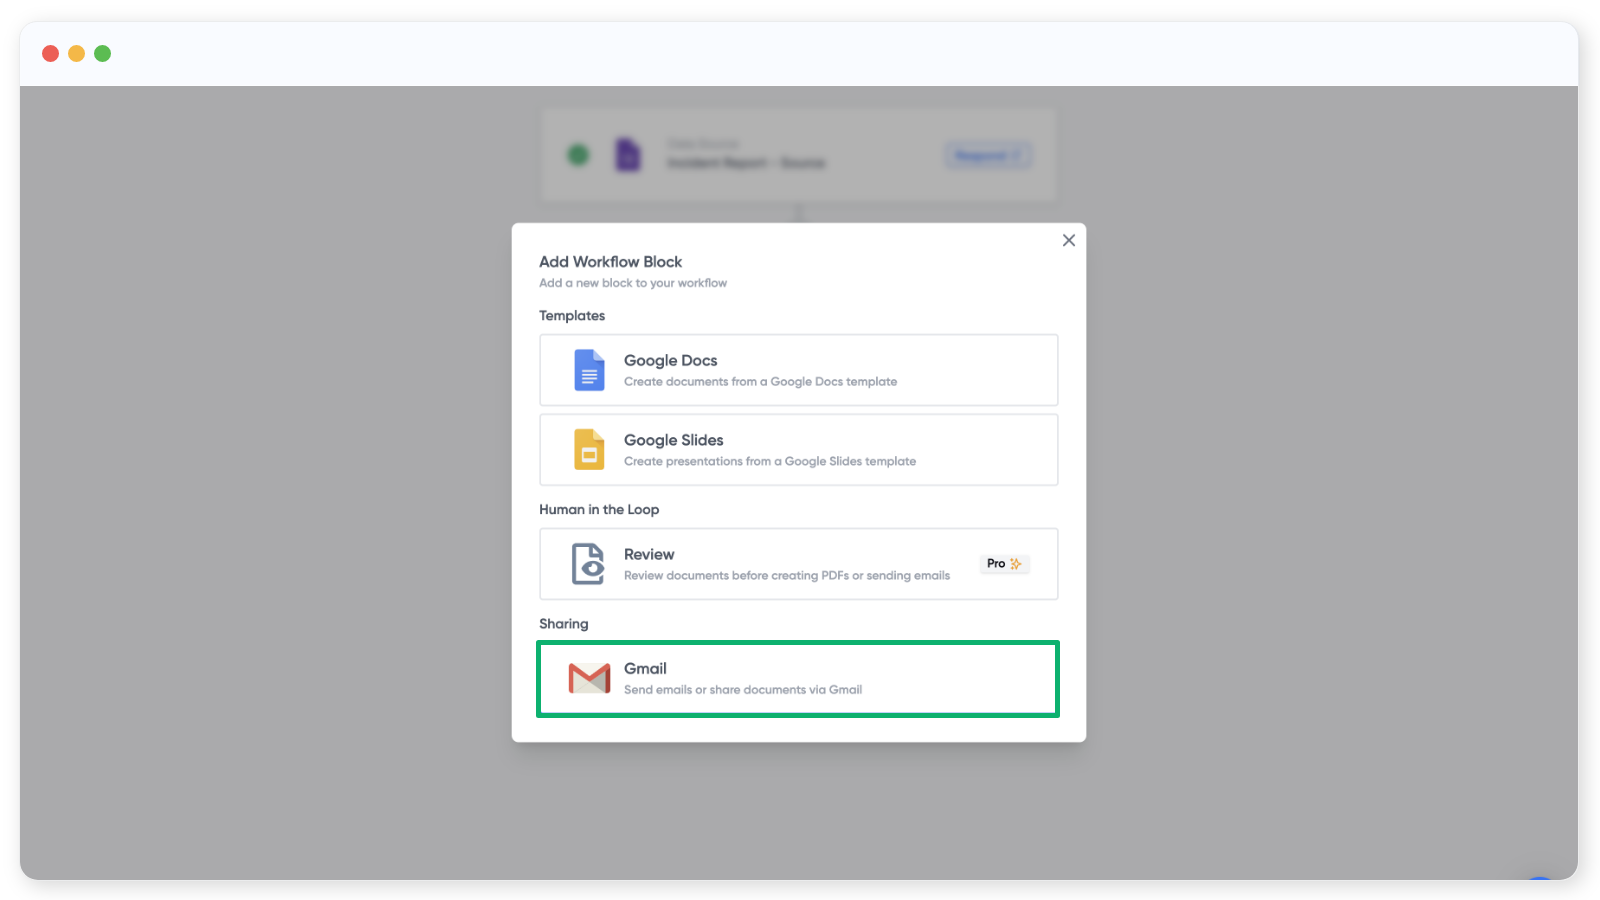
Email the document
Once the document looks the way you want, add an email step so each output is sent automatically. Click the + icon below the document block and pick the Email block.
In the email block, add To, CC, or BCC addresses. You can type addresses directly or use tags from the source table on the right. Then add a subject line and the email body. The formatting controls let you style the message.
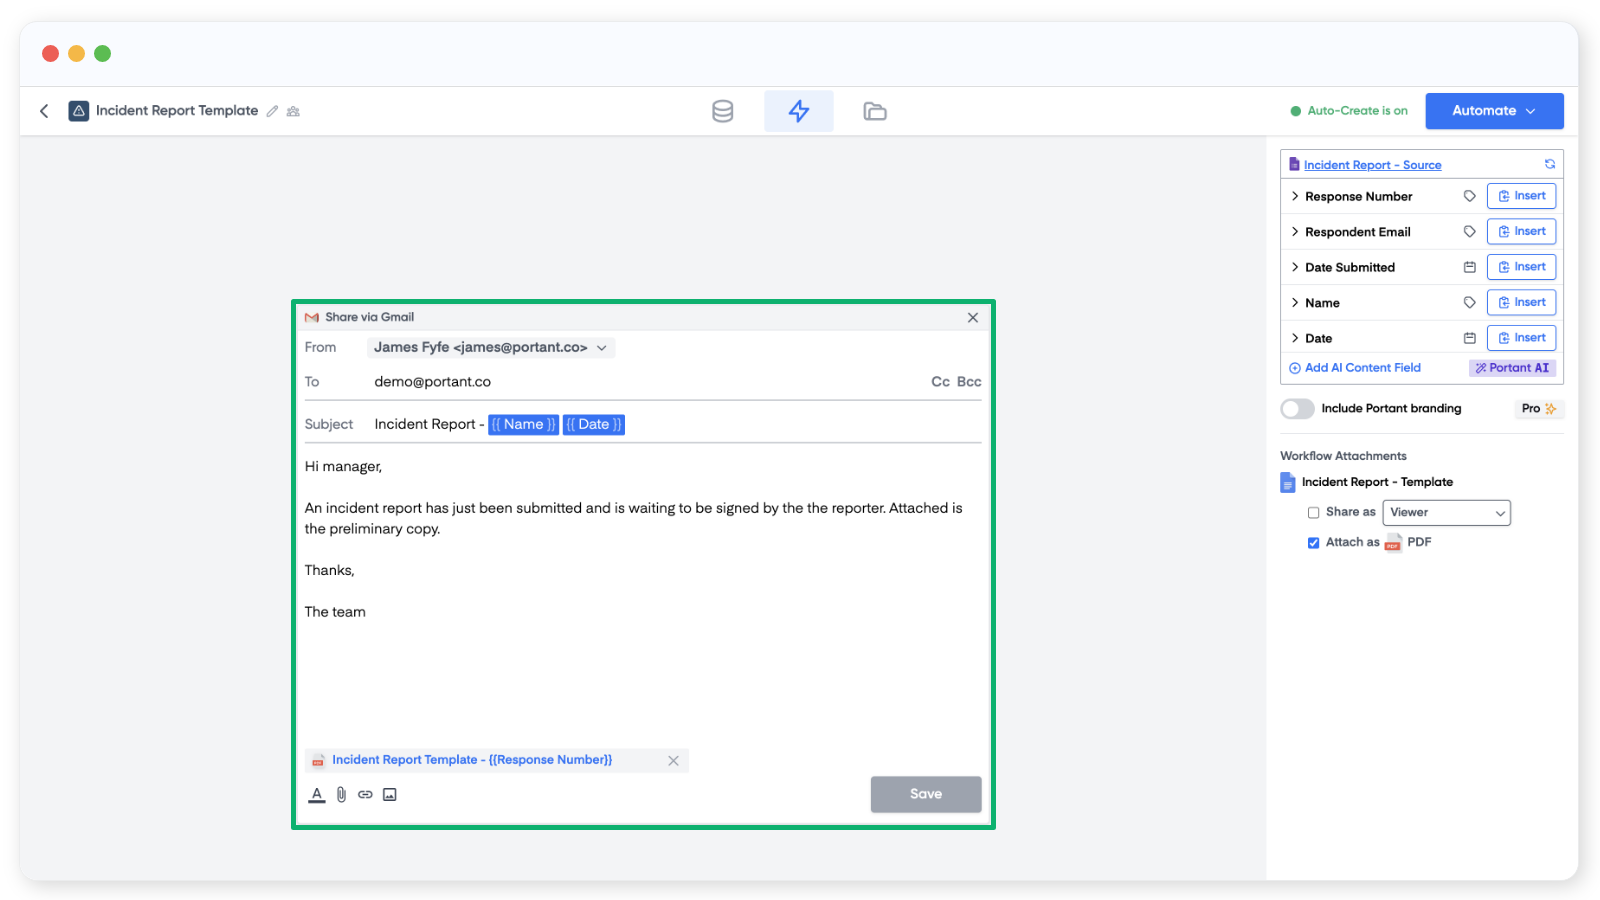
The last step is to attach the workflow output. For Google Slides and Docs, you can also choose Viewer, Commenter, or Editor permissions.
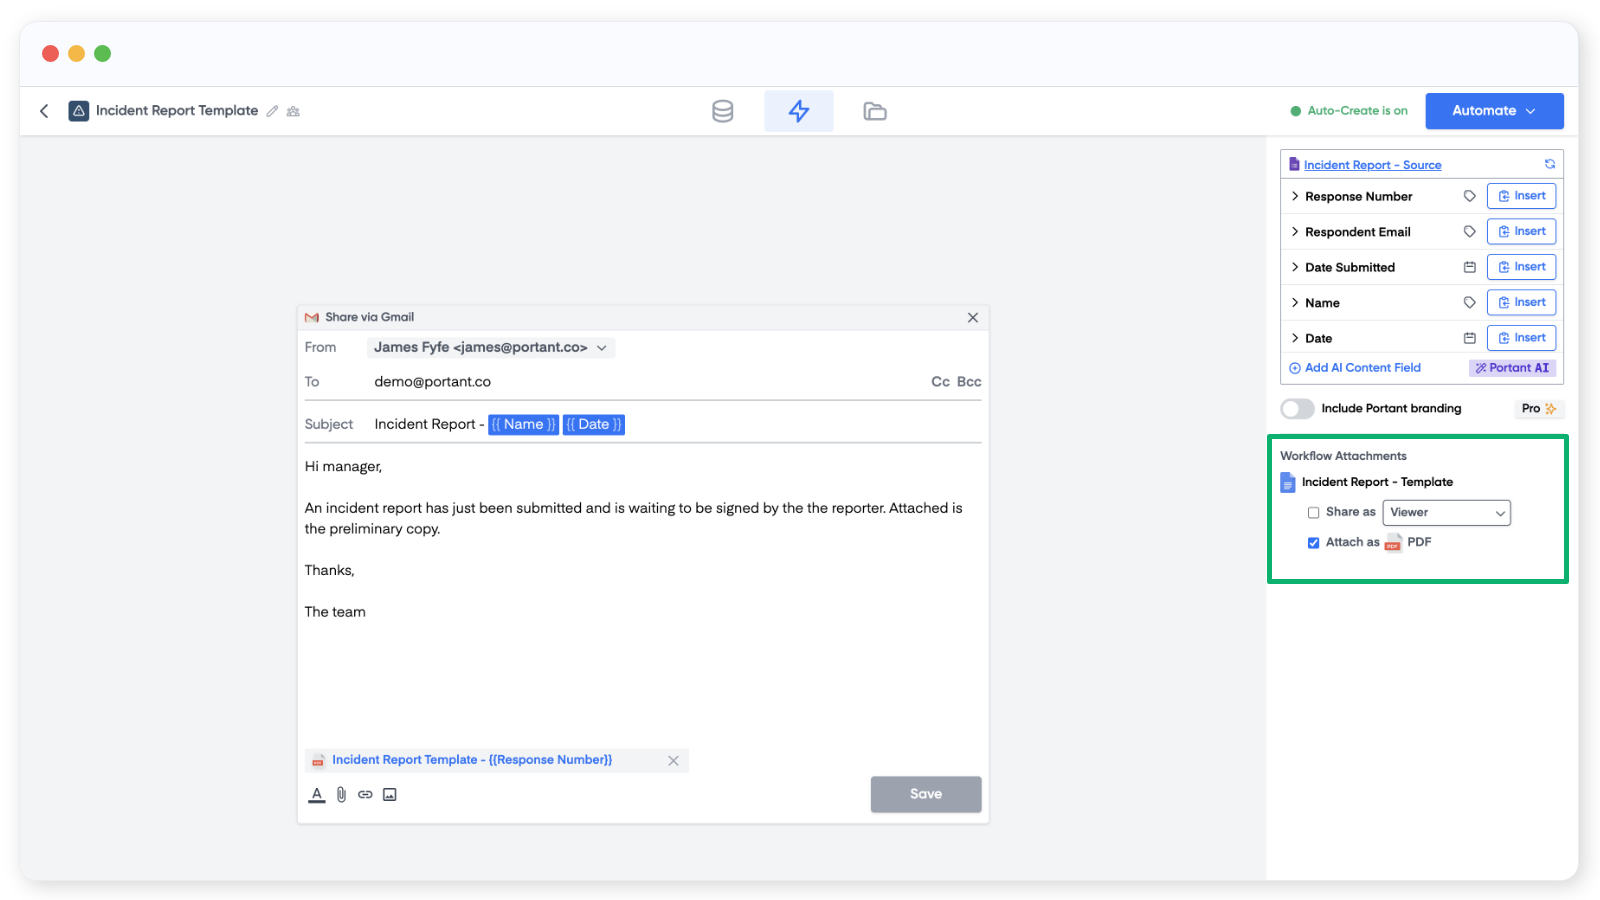
Click Save at the bottom and close the email block.
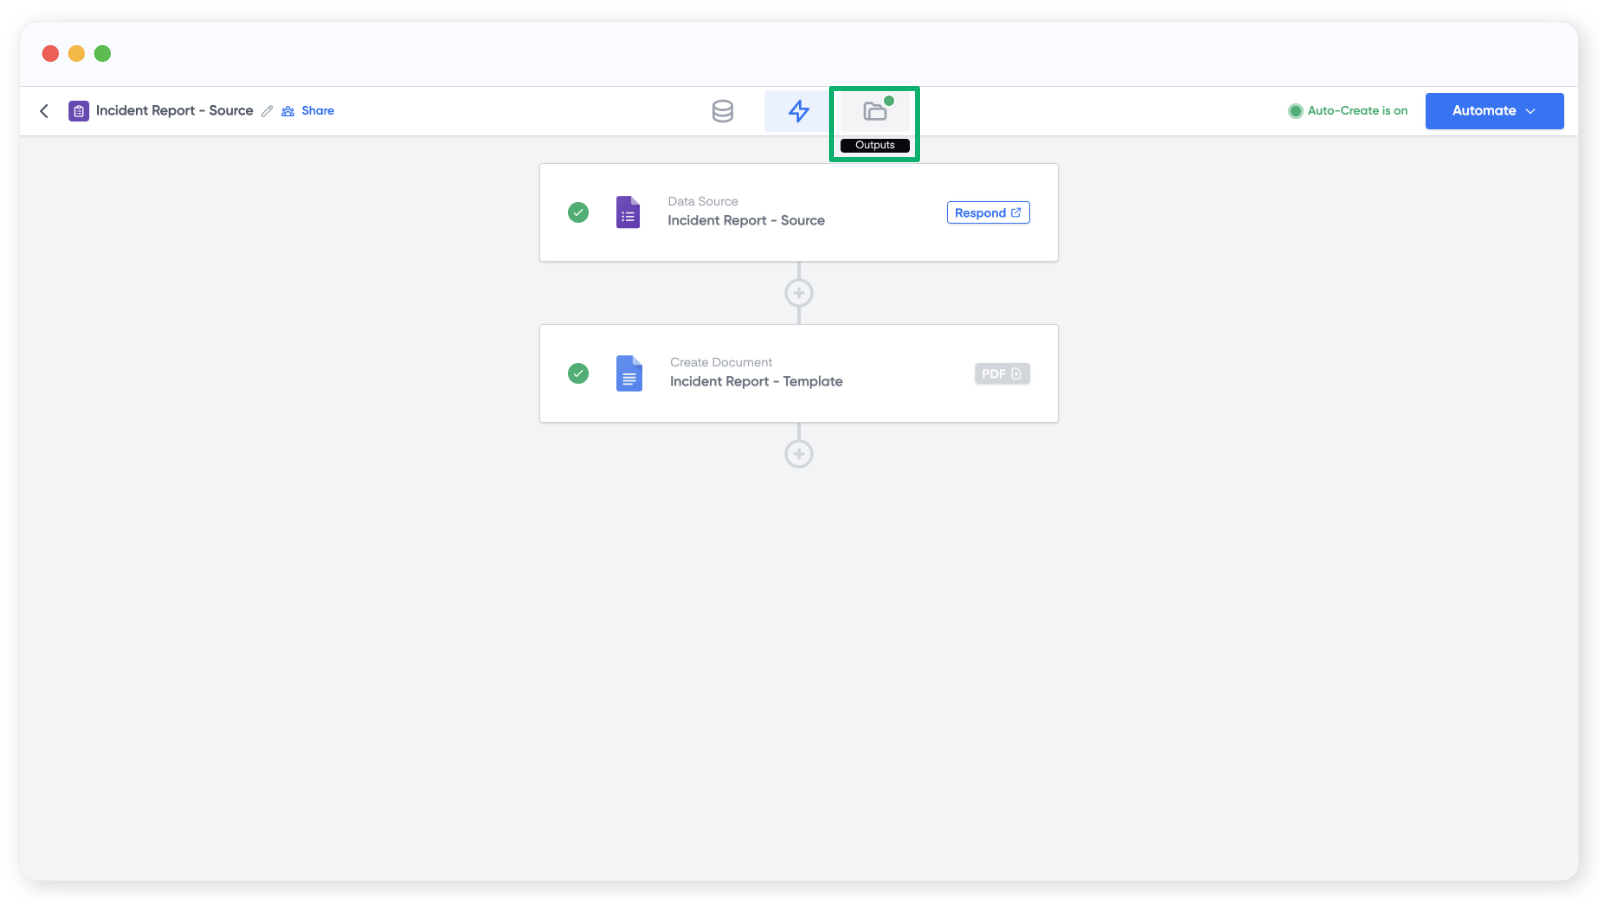
Turn on the workflow
When the workflow is ready, click Automate in the top right and toggle Auto-create on. From now on, every form response will run through the workflow and produce a document.
You can also process old form responses from this panel using Process Existing Data. Run all of them, or pick a custom range.
To check it's working, open your form and submit a test response. The new document will show up in the Outputs tab.
That's your first workflow done.