In today's digitally-driven world, the days of ink-on-paper signatures are rapidly becoming a thing of the past. As businesses and individuals seek efficient and secure methods for signing documents, digital signatures have emerged as a game-changer.
In this comprehensive guide, we will explore the top three ways of creating electronic signatures, accompanied by step-by-step guides that walk you through each method.
Whether you're looking to streamline your workflow with Portant's E-Signature Functionality, prefer the traditional draw-and-scan approach, or harness the power of Adobe Acrobat Sign, we have got you covered.
Need to sign a PDF?
Upload your PDF, add your signature and download the signed file. Free, no signup, no watermark.
3 Top Ways of Creating an Electronic Signature
Traditional ink signatures are now making way for electronic signatures, offering convenience, efficiency, and security like never before. This journey into the world of modern signatures takes us along three distinct paths, each offering its unique approach to electronic signing and authentication.
1.Use Portant's E-Signature Functionality
Gone are the days of manual data entry and cumbersome formatting when dealing with agreements and invoices.
Portant's E-Signature functionality integrates seamlessly with your Google Docs template, making it a breeze to sign contracts in a digital format, complete with comprehensive information, including multiple line items and payment details.
We are heavily invested in your document management workflow, ensuring a hassle-free experience so you can work on more important aspects of your business.
Step-by-Step Guide: Automating eSignatures with Portant
Step 1: Copy our eSign Template
Log in with Your Google Account: Start by logging into Portant using your Google account credentials. This step ensures seamless integration with your Google Drive.
Authorize Portant: Grant Portant the necessary permissions to access and manage files in your Google Drive. This authorization enables Portant to place the required files in your drive.
Select Document Templates: Within Portant, you'll find a versatile selection of document templates to choose from.
These templates cover various document types, including:
- offer letter,
- invoice,
- employment contract,
- graduation certificate,
- purchase order,
- student progress report,
- parent's letter, etc.

Step 2: Choose Your Agreement File (Optional)
Automatic Creation: When you copy the template, Portant will automatically generate a Google Docs contract template and the corresponding form.
Select Your Own Template: If you have a specific Google Docs contract template you'd like to use, you can select it. In such cases, ensure that the chosen template aligns with your requirements.
Update Tags (If Necessary): If you decide to go with a new spreadsheet/form, remember to update the tags within your chosen template document to ensure it integrates seamlessly with Portant's eSign functionality.

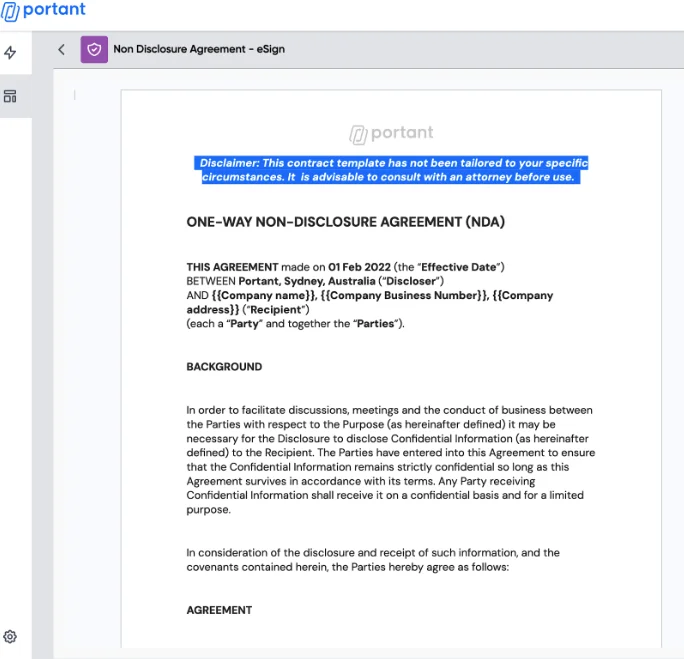
Step 3: Customize the Template (Optional)
Open the Document Block: If you've opted to add your own contract template, access the document block where you can make customizations.
Add Tags: Insert the necessary tags into your document to indicate where signatures and other relevant information should be placed. This step customizes the template to your specific needs.
Step 4: Turn on Auto-Create
Activate Auto-Create: Toggle on the auto-create feature within Portant. This action sets in motion the automation process.
Automated Document Distribution: With auto-create enabled, Portant will automatically email them a document for signing every time someone responds to your form. The signed contracts will not only be emailed to you, but the same signature will also be sent to your customers.
A copy of the signed document will also be securely stored in a designated folder within your Google Drive.
By following these straightforward steps, you'll harness the power of Portant's eSign capabilities to simplify and automate the document creation and signing process, saving you time and effort while ensuring e-signing is a seamless experience for all parties involved.
And just like magic, your documents are now automated! No more tedious copying and pasting of data or manual PDF exports.
We understand the frustration that can arise from these mundane and time-consuming tasks. That's precisely why Portant has emerged as a valuable ally, simplifying your document management journey.
Whether you're a business professional, entrepreneur, or simply someone looking to enhance their document management capabilities, Portant empowers you to effortlessly generate invoices whenever you need them.
2.Traditional Draw Signature and Scan Document Option
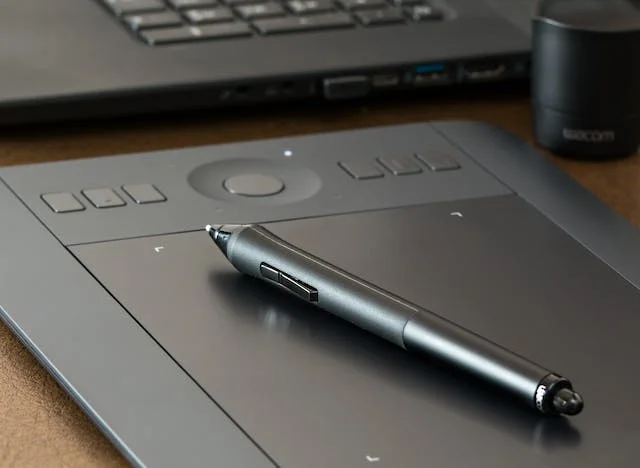
Generating a digital signature through the traditional draw-and-scan approach involves a combination of physical and digital processes:
- signing your name with a pen,
- capturing a photo of it,
- transferring it onto a digital device.
This method, though convenient, does have its limitations.
Signatures done in this manner lack the robust security features associated with dedicated signature software. Essential components, such as a digital ID or a digital certificate, which validate the signature's authenticity, are missing.
Moreover, once you start using alternative electronic signature methods, the process of converting your handwritten signature into a digital format might seem frustrating, and hard to get it up to a hand-written standard. To skip the scanning step, you can use our free signature generator to draw or type your signature and download it as a transparent PNG.
When dealing with PDF files or paper documents, this approach may encounter difficulties, and its feasibility hinges on the software employed for signing documents. Numerous PDF tools do not support the insertion of images directly into the document.
3.Adobe Acrobat Sign
Adobe's invention of the PDF format dates back to the 90s, and they've developed many features since then to complement their invention.
You can now upload a PDF into their software with the ability to create an electronic signature with a convenient drag-and-drop option. If you only need to add a signature to a single file, you can also sign a PDF online for free without creating an account.
Step-by-Step Guide on Signing Digital Documents with Adobe Sign
Step 1: Set Up Your Adobe Account and Access the Email
- Create an Adobe Account: Begin by creating an Adobe account if you don't already have one. This account will grant you access to Adobe Acrobat Sign. Follow the account creation process.
- Open Your Email: Once your account is ready, open your email inbox and locate the email containing the document that needs your signature. Inside the email, you'll find a link labeled "Click here to review and sign."
Step 2: Initiate the Signature Process in the Document
- Locate the Signature Field: Look for the designated "Click here to sign" field inside the document. Click on this field to initiate the signature process.
- Trigger the Pop-up Window: Clicking the signature field will open a pop-up window, guiding you through the signature creation process.
Step 3: Choose Your Preferred Signature Method
- Explore Signature Options: Inside the pop-up window, you'll have several signature options to choose from:
- Type Your Name
- Draw Your Signature (using your mouse)
- Sign with Your Finger or Stylus (on a mobile device)
- Upload an Image of Your Signature
- Recommended Signature Image Size: If you opt to upload an image, ensure that it meets the recommended size of at least 60 pixels in height and 600 pixels in width. For the cleanest look, change the image background to white or make it transparent before uploading. The signature image will automatically adjust to fit the signature field.
Step 4: Apply Your Signature
- Add Your Signature: Once you've chosen your preferred signature method, click "Apply" to add your signature to the designated signature line within the document.
- Preview the Signed Document: Before finalizing your e-signature, take a moment to review the document to ensure it appears as intended.
Step 5: Complete the E-Signature Process
- Finalize Your E-Signature: At the bottom of your screen, you'll find an option labeled "Click to sign." Select this option to complete the e-signature process.
- Automated Document Sending: Adobe Acrobat Sign will automatically send the final signed document to both you and the sender. This streamlined process ensures that all parties involved receive the signed document promptly.
By following these step-by-step instructions, you can effortlessly create your e-signature using Adobe Acrobat Sign, simplifying the document signing process and facilitating seamless digital transactions.
Some major drawbacks regarding Adobe's E-signatures are:
- Not that user-friendly,
- Lack of built-in tools for creating documents from scratch,
- Expensive for the features that it offers(you can do more with the options mentioned above).
FAQs
Q.How do I create a digital signature in Google Docs?
A.Portant's workflow enables you to sign Google Docs in easy steps. You can also convert Google Forms to Google Docs.
Q.Does Google offer a digital signature?
A.While Google itself doesn't offer such a feature, with Portant, you can sign electronic documents digitally within the Google Workspace ecosystem.