How to Create an Invoice in Xero?
If you run a small business, you know how important it is to maintain accurate records of your income and expenses. Xero is an accounting software that helps you do just that.
One of the many things you can do with Xero is creating invoices for the services or products you provide to your customers.
In this article, we will go through the steps required to create an invoice in Xero.
How do I create an invoice in Xero Accounting Software?
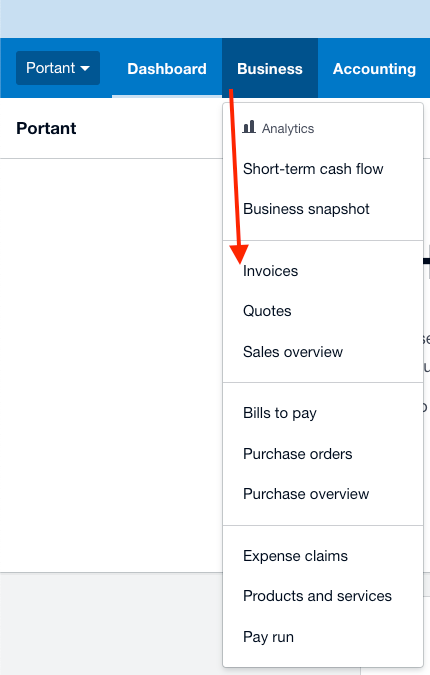
The first step to creating an invoice in Xero is to click on "Business" in the top navigation bar and click on "Invoices":
This will take you to the invoice creation page, where you need to press "New Invoice" so you can start your invoice creation process in Xero:

Before creating your invoice in the Xero accounting software, note that there are two types of invoices in Xero as seen below:
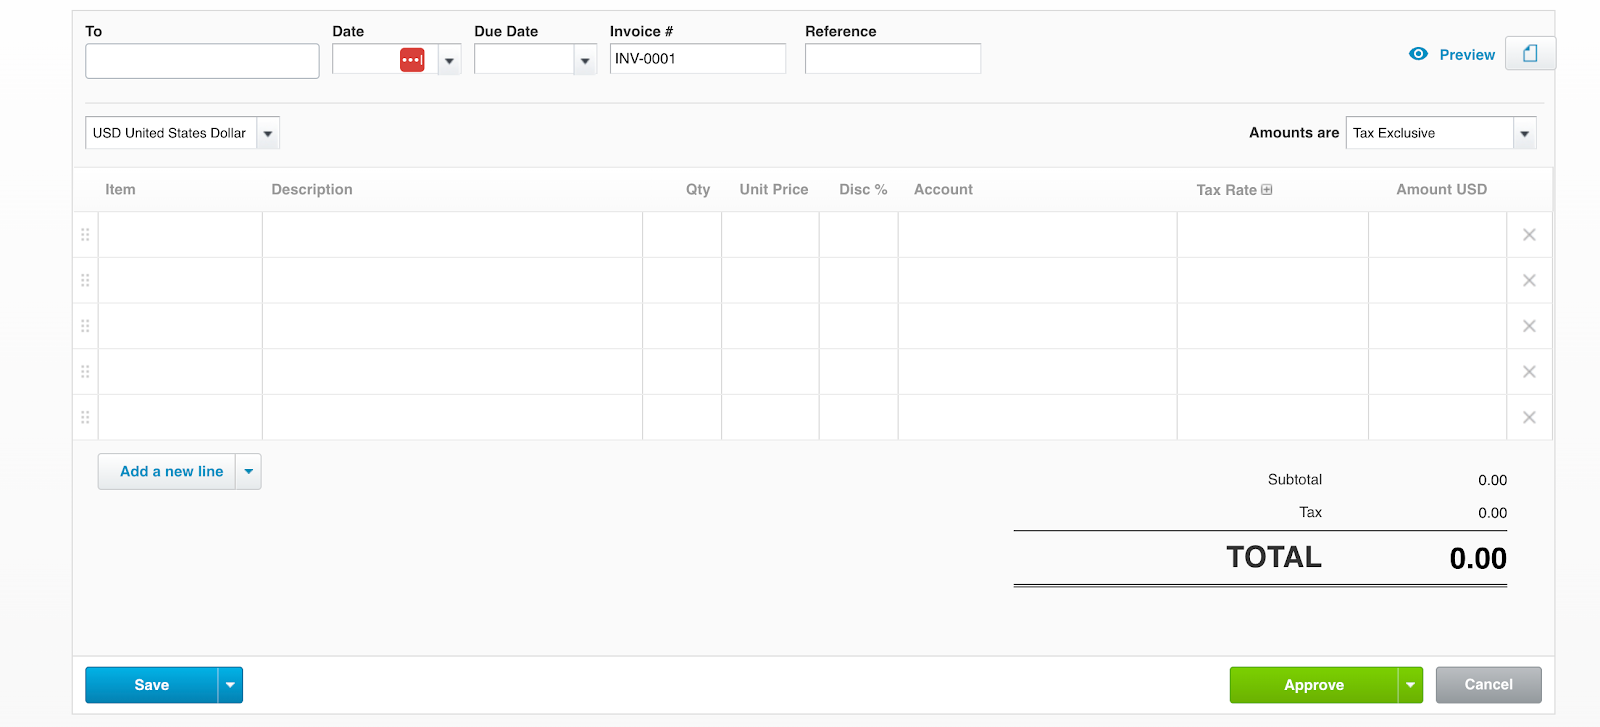
The classic invoicing interface in Xero:
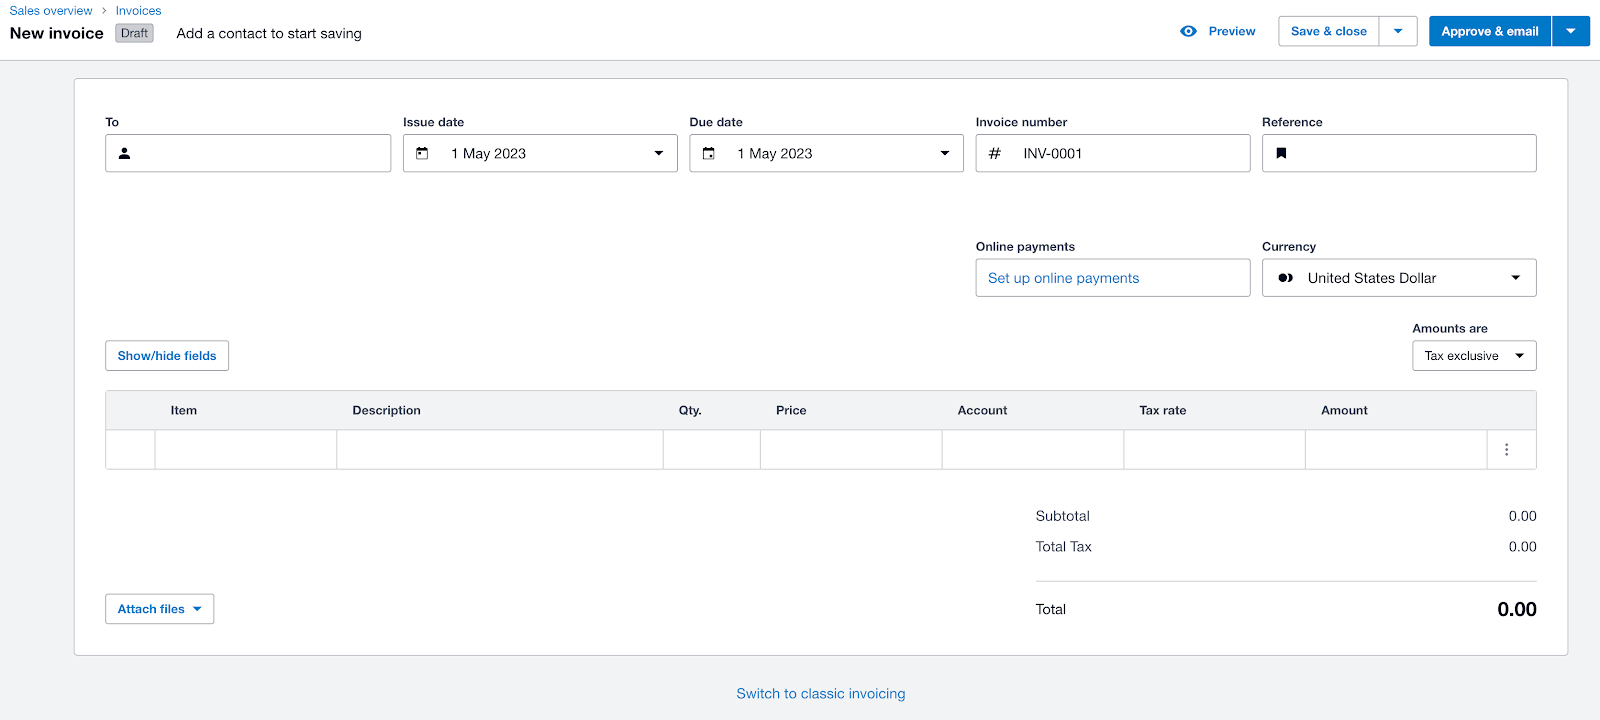
New invoicing interface in Xero:
Both invoice types in Xero contain the same following information:
- Recipient
- Issue date
- Due date
- Invoice number
- Reference
- Currency
- Tax inclusion
- Row with information on goods or services sold.
The main difference between both invoices in Xero is their design in which the new invoicing looks modern, and the old one a bit traditional.
The pros of using the new invoicing design come down to increasing the chances of getting paid.
Enter Client Information in Your Xero Invoice
The next step in creating an invoice in Xero requires you to enter the customer's name and any other contact details necessary to complete the invoice. Ensuring this information is accurate is important, so double-check before moving on.
Enter Dates in Your Xero Invoice
Adding an issue date and due date on your invoices is important because it helps to establish clear expectations between you and your customer. The issue date lets the customer know when the invoice was created, while the due date indicates when the payment is expected. This helps to avoid confusion and ensures that both parties are on the same page about when the payment is due.
Additionally, a due date on the invoice can help you manage your cash flow more effectively by providing a clear timeline for when you can expect to receive payment.
Xero makes adding your issue and due date to your invoices easy.
Include Services or Goods Sold to Your Xero Invoice
Now it's time to add the products or services you provided to the customer. You can include as many items as you need, each with its pricing field.
You can also choose whether to include sales tax by adding the tax percentage in the "tax rate" field, which we will cover in more detail later in the next section.
Another convenient feature that Xero offers is by letting you attach a file, which could be a more detailed breakdown of the services completed or products sold.
This feature is convenient if your business is more strict in maintaining and organizing documentation.
How do I Apply Sales Tax to My Invoice in Xero?
It's essential to make sure your invoices have the correct sales tax included. This is especially important in the US, where sales tax rates vary significantly from state to state.
To add sales tax to your invoice in Xero, you only have to toggle the dropdown menu and select one of the options depending on if a sales tax applies in your country for the services or goods sold.
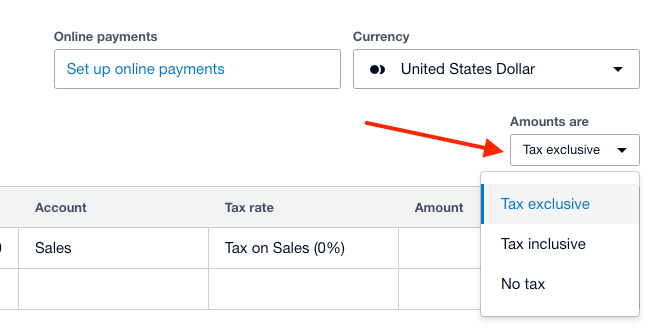
After you select the option based on your needs, you will get the option to include the tax rate in each row of your services or products specified in the table of your invoice.
Review the tax calculation breakdown and ensure it is accurate before saving the invoice. This will ensure that the correct amount of tax is being charged to your customers and that your records are accurate.
How do I Set an Invoice Number in Xero?
When managing your billing, you must ensure your invoices are organized and numbered correctly. You don't want to send the wrong bill to a customer or mix up your records by mistake. Fortunately, Xero makes setting your invoice number and due date easy in just a few steps.
Under the "invoice number" field, include the correct invoice number based on your records of previously sent invoices:
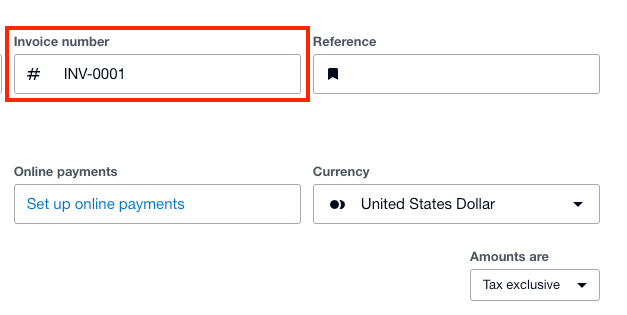
Adding an invoice number to your invoices will ensure that your invoices are numbered correctly and help you make organizing invoices easier in your accounting records.
How to Add Your Logo and Branding to Your Invoices in Xero?
When writing an invoice is essential to include your company's logo and branding so your invoice ends up being as professional as possible.
Xero will allow you to customize your invoices with your business logo, colors and other details that will make your invoices look unique so the client knows right away that the invoice sent comes from you.
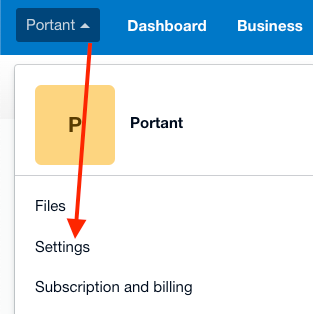
To add your company's branding client on your business name in the top left of Xero's dashboard and click on "Settings":
Then you will have to click on "Organisation details" and add all your business information, including your logo and other details:
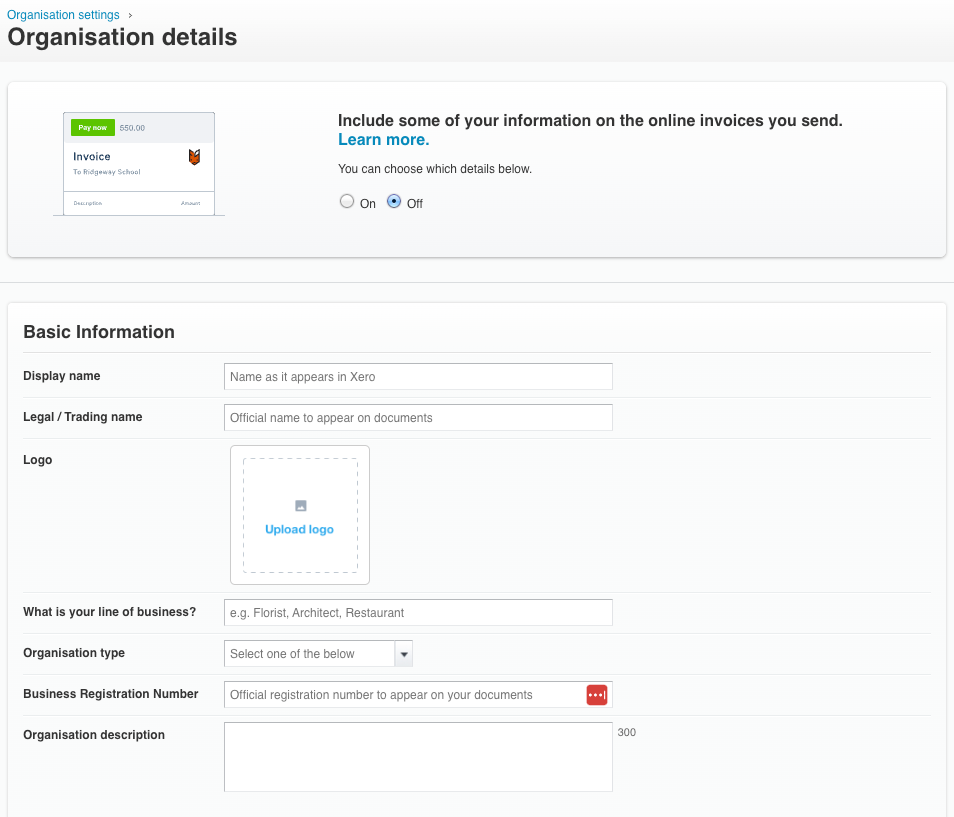
After you add your company details, the branding and other info will dynamically appear in new invoices you create.
How Do I Set Up Payment Details for My Invoice?
Another critical step in creating an invoice is setting up payment details. This is where you can display the relevant information for your customers, such as the bank account they need to pay into and any additional information they need to know about the payment process.
To get started on this, go to the invoice you want to add payment details to and click the 'Edit' button in the upper right corner to access the menu.
Next, scroll down to the 'Payment Services' section and fill in the necessary details. You can cancel the payment or add payment details based on your preferences, and Xero will automatically provide you with a payment field on the invoice.
How do I Apply Credit Limits to my Customers in Xero?
In business, credit limits are a crucial part of managing your finances effectively. You don't want to extend too much credit to customers who may not be able to make payments on time, but at the same time, you don't want to lose a sale because of a low credit limit.
To help you strike a balance, Xero allows you to apply credit limits to your customers easily.
To apply credit limits, go to the 'Contacts' menu on the main dashboard of your Xero account. The first step requires selecting the customer you want to apply credit limits to from the list. Once you've found the contact you want, click on the 'Edit' button to access their details. In the second step, enter the customer's credit limit information, and Xero will automatically display this information if you need to check it later.
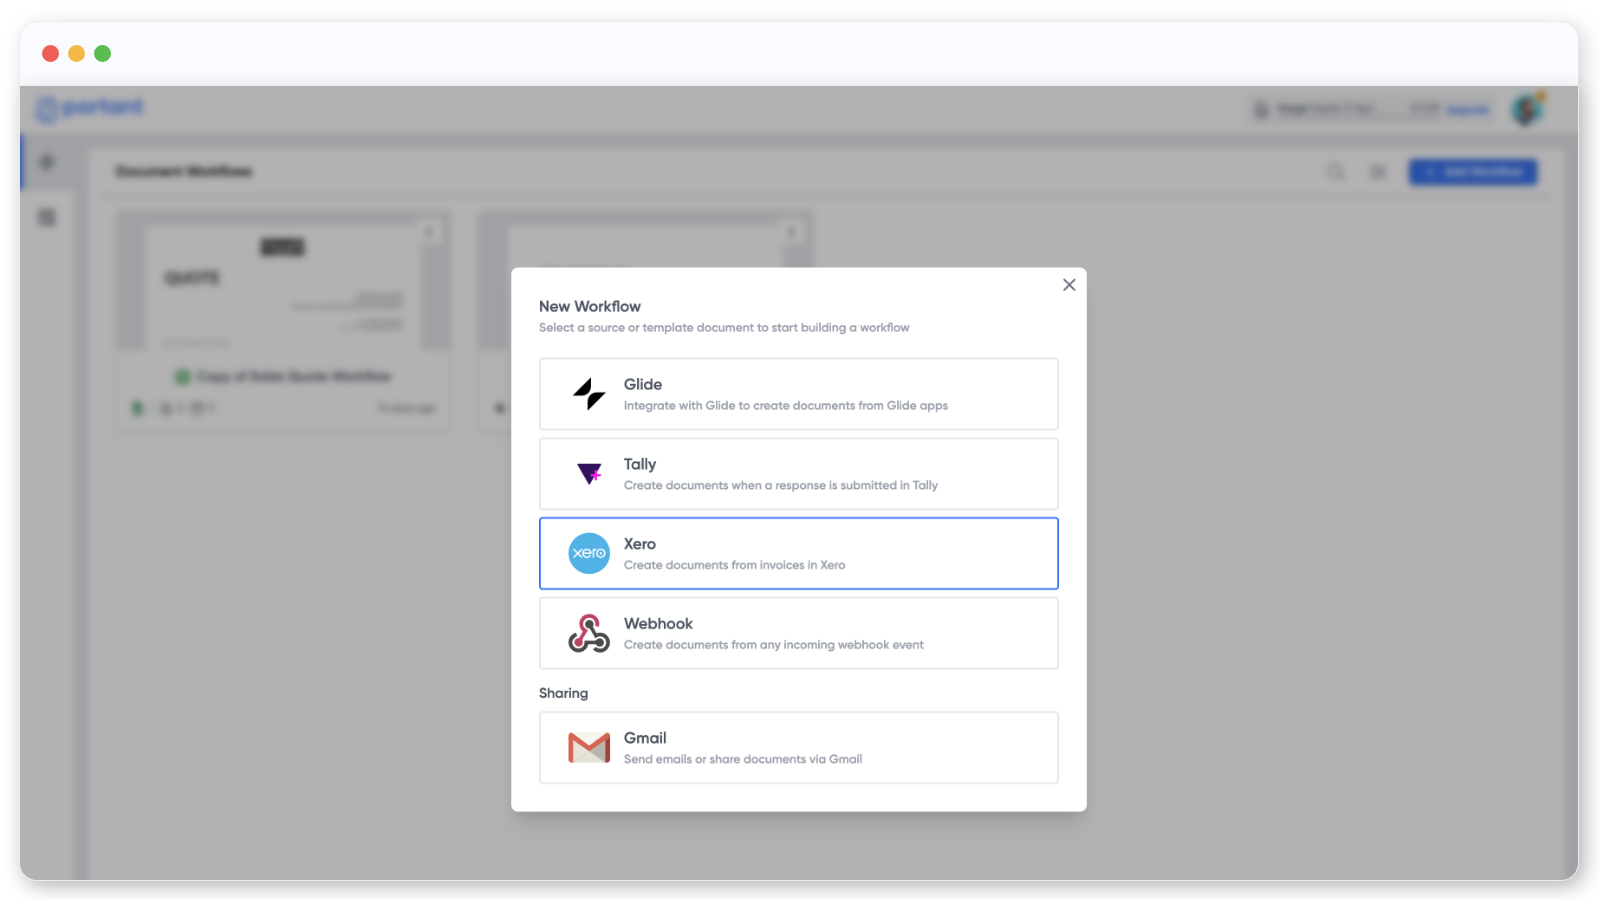
Overcome Xero's Limitations Using Portant's Integration
While Xero has great features for invoicing, it still has limitations for businesses that have a lot of customers and need to send invoices in batches.
That's where Portant excels, enabling your business to process many invoices simultaneously and send them out via email.
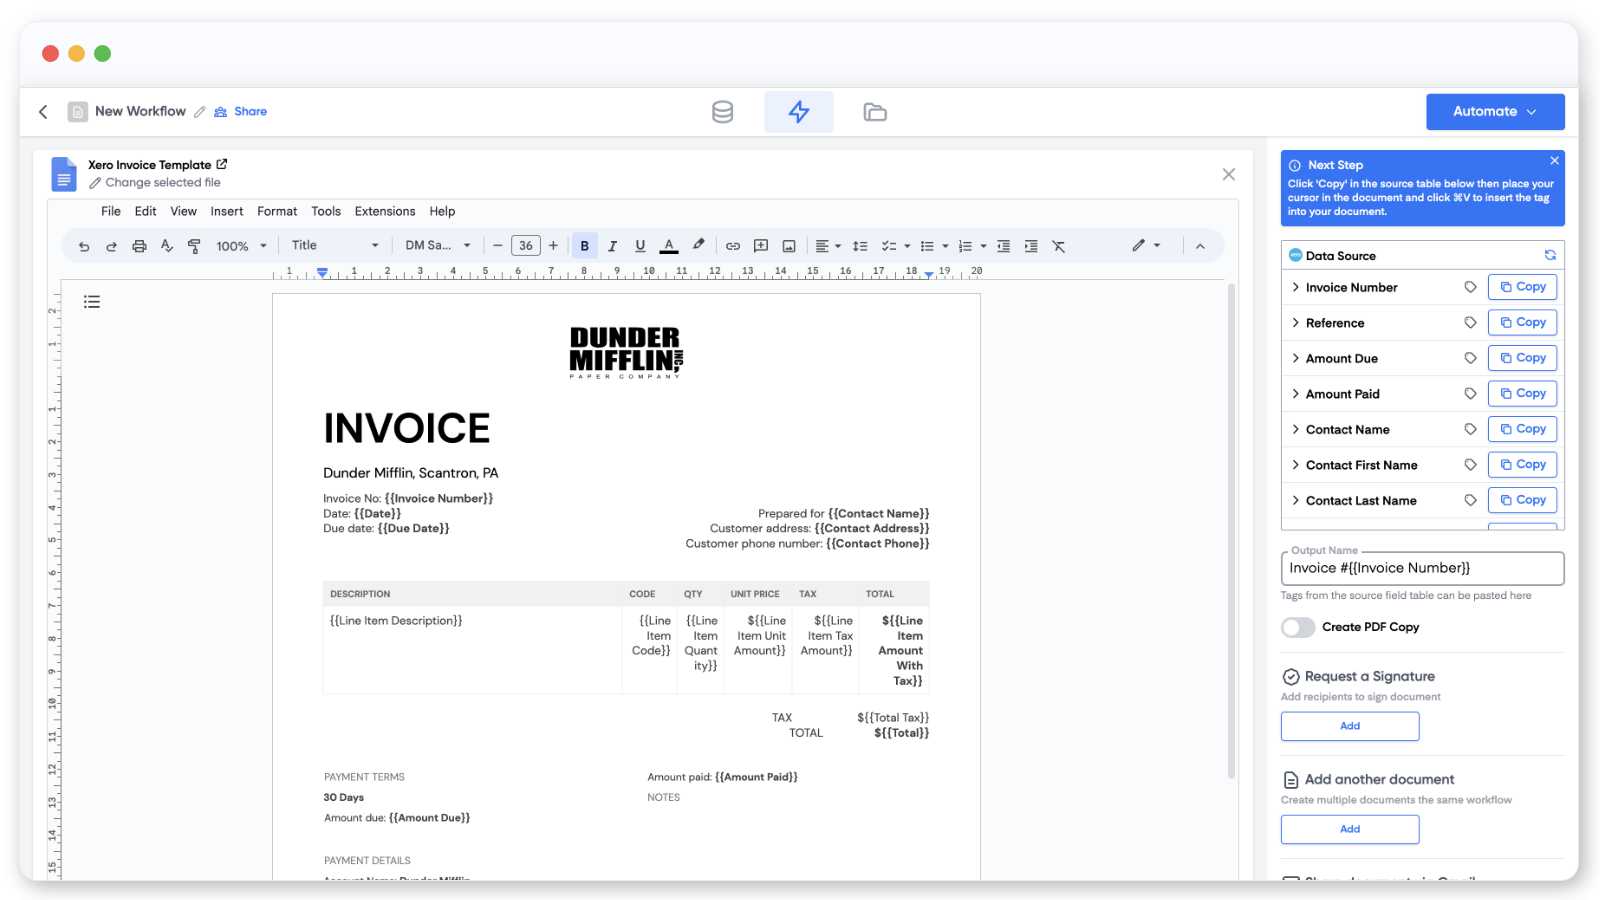
Portant’s integration capability with Xero accounting software makes it easy to import invoices from Xero into Portant and customize them with various templates.
One of the major limitations of Xero is the lack of diversity in invoice templates, which makes it difficult to tailor invoices to specific customers.
However, with Portant's invoice templates for different customers, businesses can easily create invoices tailored to the customers’ needs. This helps to improve the efficiency of the invoicing process, as businesses can quickly create and send out invoices that meet the needs of their customers. This is because you can create multiple Invoice templates in Google Docs and use their market-leading formatting options. You can then connect these templates to Xero in different workflows and run them based on conditions.,.
Portant allows businesses to connect their email accounts and send emails in batches to their customers. This is a major advantage over using Xero itself, as it streamlines the entire invoicing and communication process by saving you time and resources the long run.

.webp)